Introduction
Over the past few weeks, I've been learning AWS by building projects instead of just watching courses.
For this project, I wanted to build something that actually looks like a real deployment. Not just launching an EC2 instance and serving a webpage, but putting together multiple AWS services into one architecture.
The goal was simple.
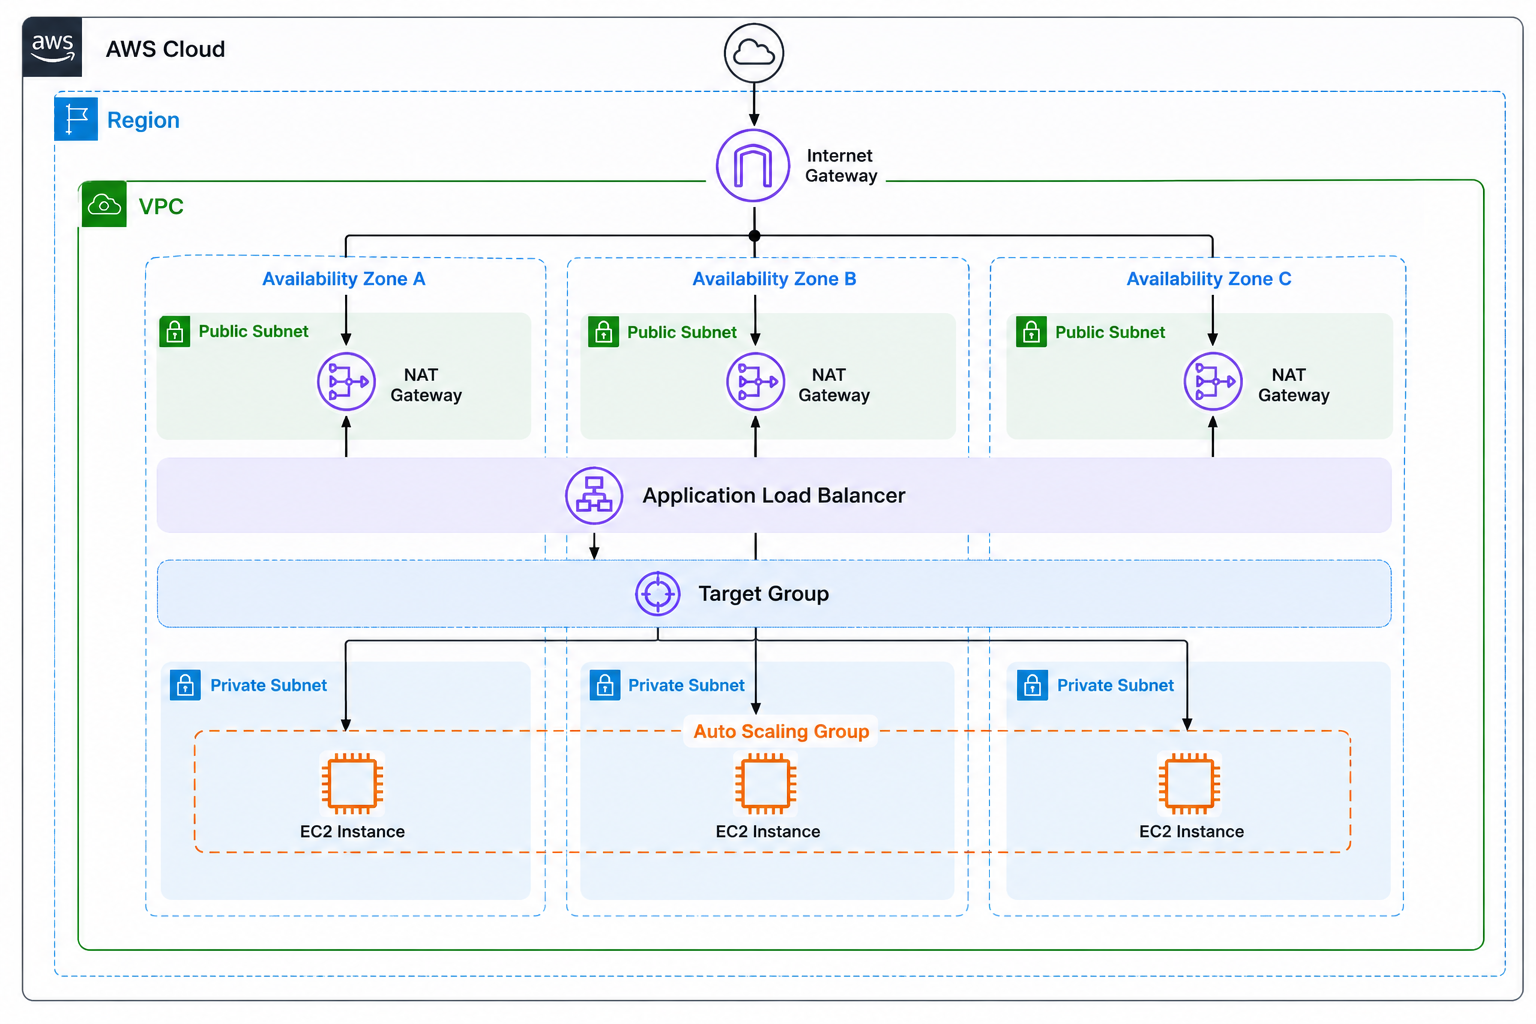
I wanted to build a web application that could handle traffic across multiple Availability Zones, keep the application servers private, automatically replace failed instances, and follow AWS best practices as much as possible.
By the end of the project, I had built a complete highly available web infrastructure using a custom VPC, public and private subnets, NAT Gateways, an Application Load Balancer, a Target Group, a Launch Template, and an Auto Scaling Group.
Starting with the Network
Before launching any servers, I needed a network to put everything in.
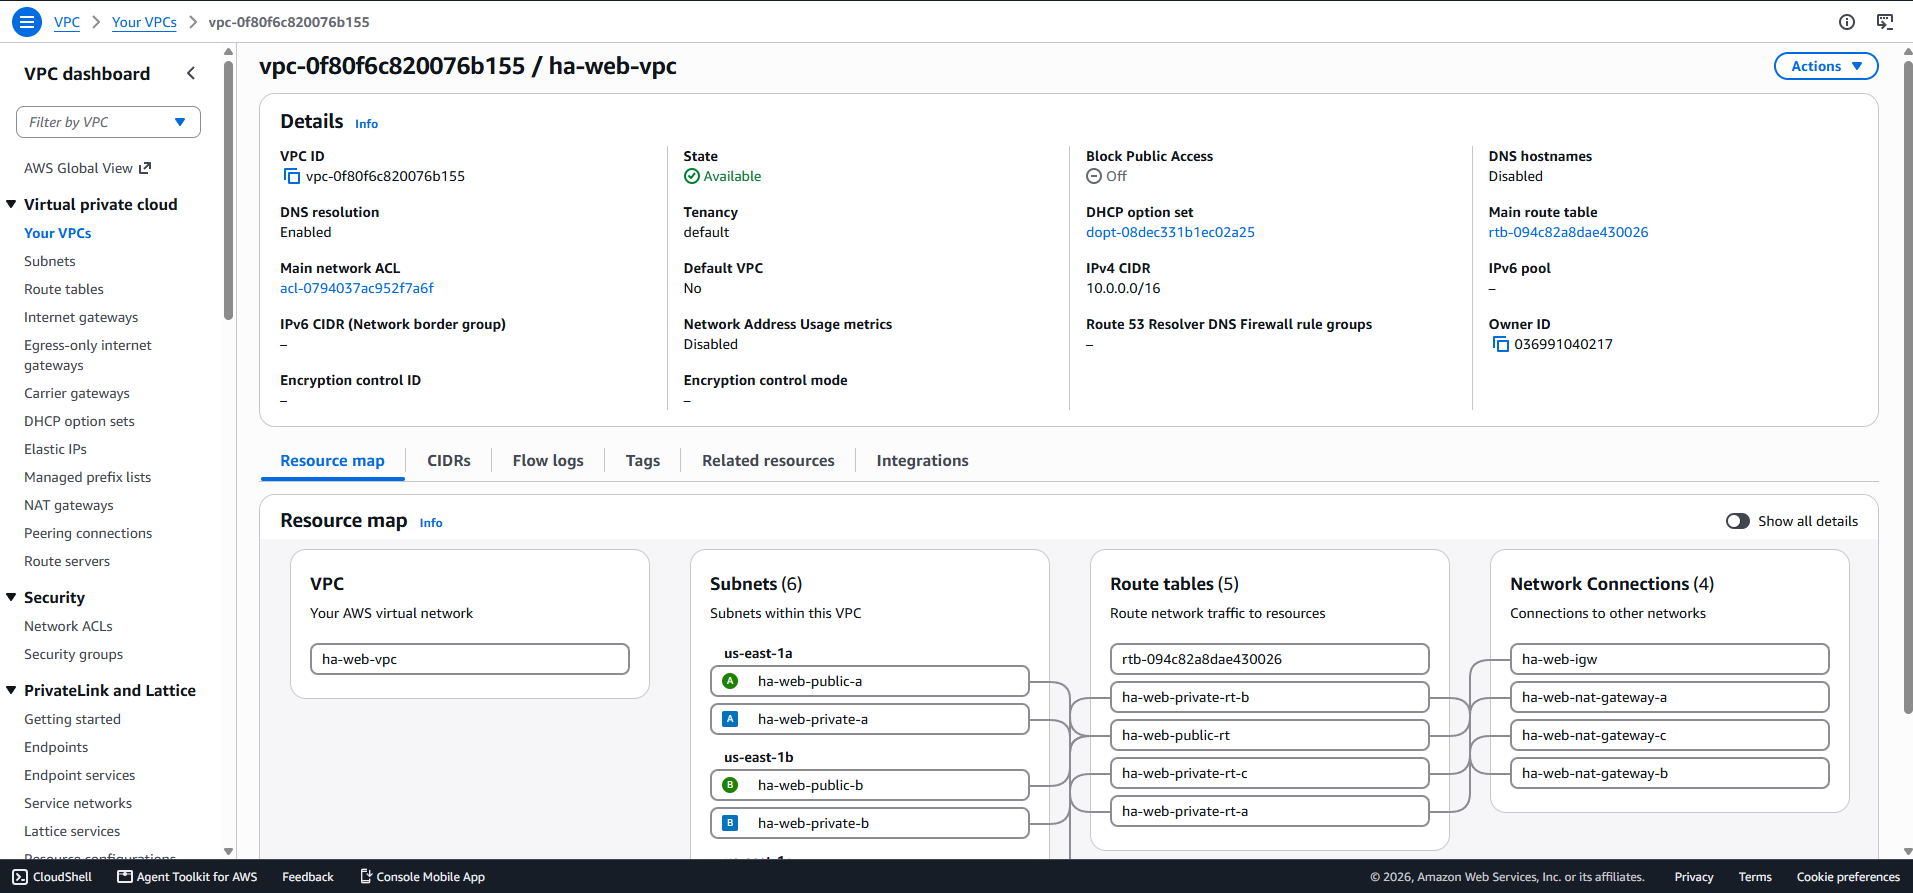
Instead of using the default VPC that AWS creates for every account, I created my own VPC. That gave me complete control over the networking and made the whole setup feel much closer to how things are usually built in production.
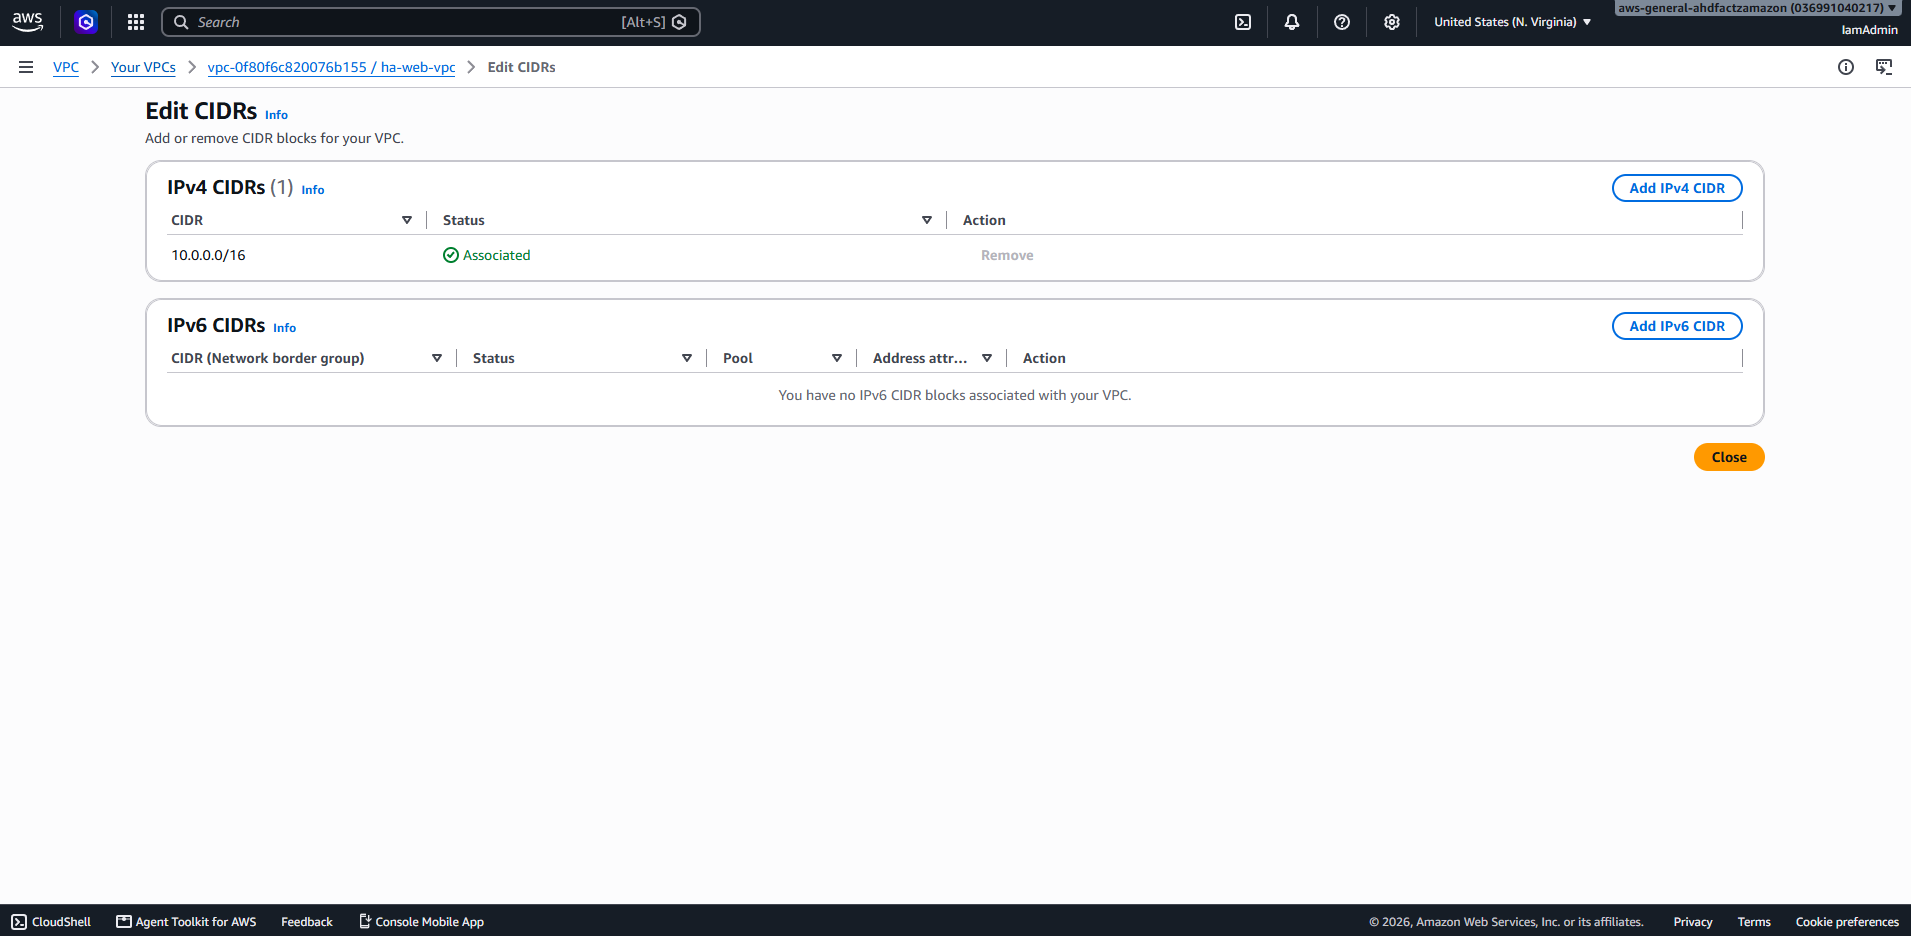
I also assigned my own CIDR block so I could create the subnets exactly the way I wanted.
Splitting the VPC Across Three Availability Zones
High availability was the whole point of this project, so everything needed to be spread across multiple Availability Zones.
Inside the VPC, I created three Availability Zones.
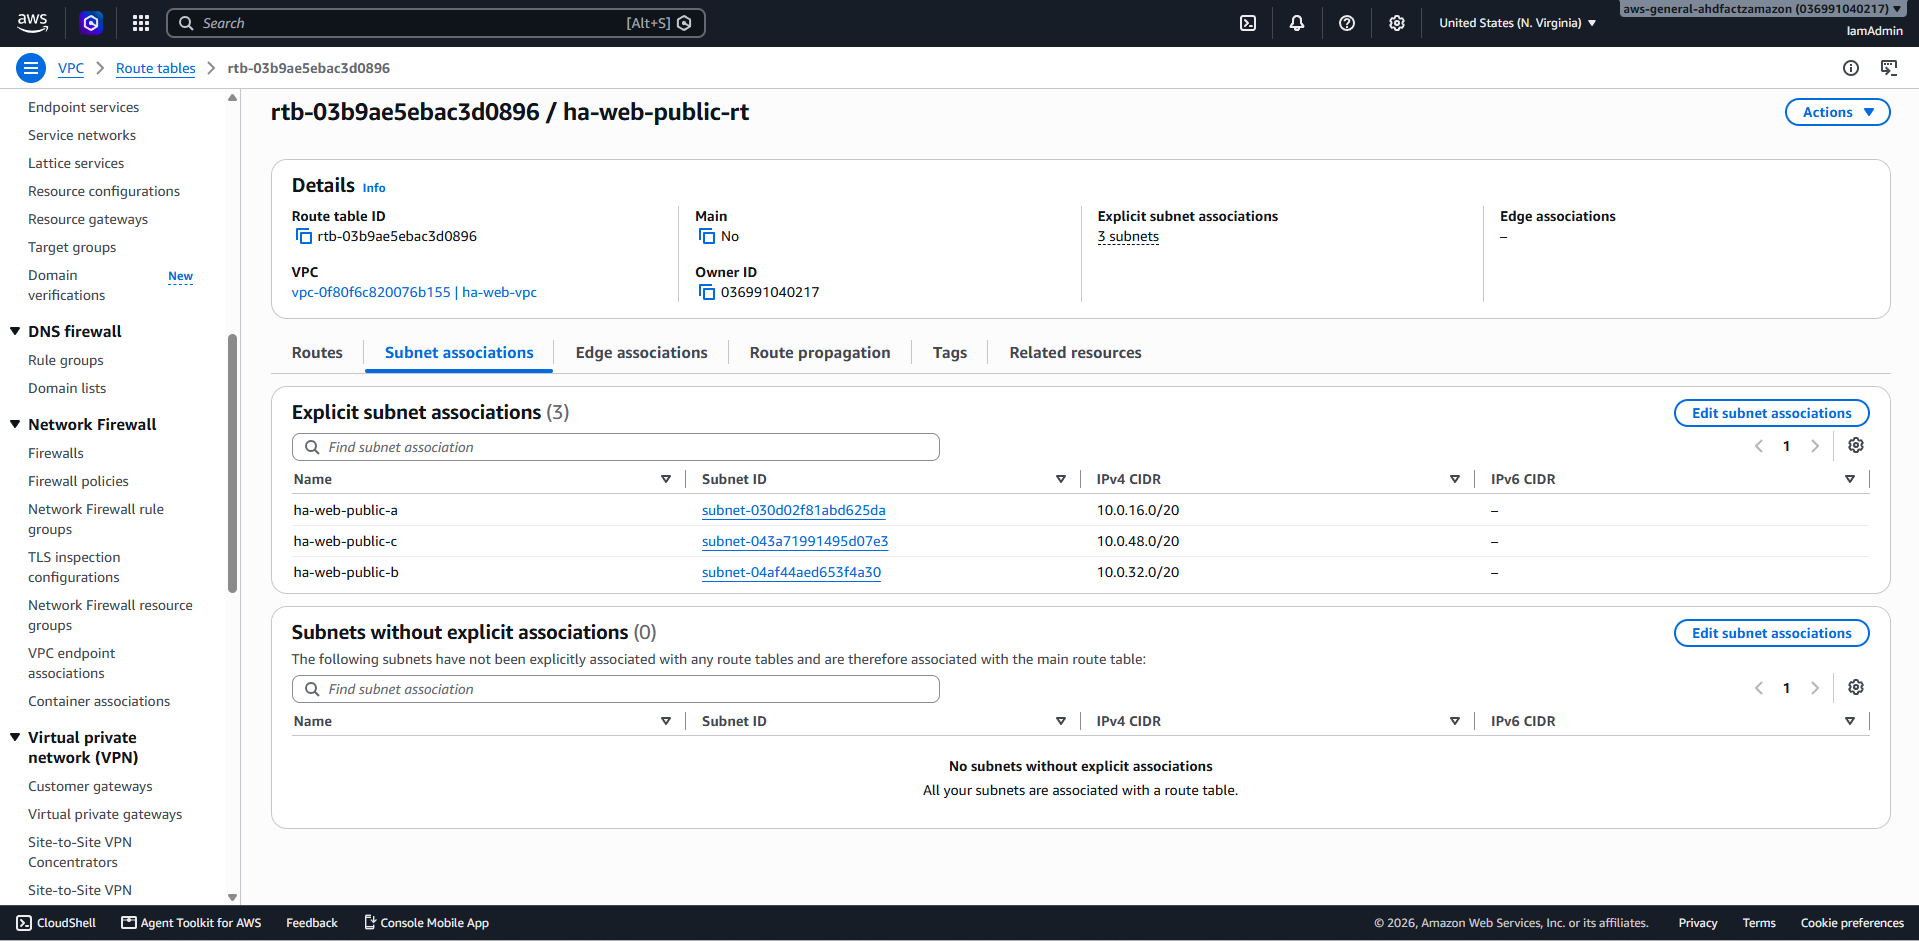
Each Availability Zone has one public subnet and one private subnet.
The public subnets are where internet-facing resources live.
The private subnets are where the EC2 instances run.
That way, even if one Availability Zone goes down, the application can continue serving traffic from the other two.
Giving the VPC Internet Access
The Application Load Balancer needs to receive requests from users on the internet.
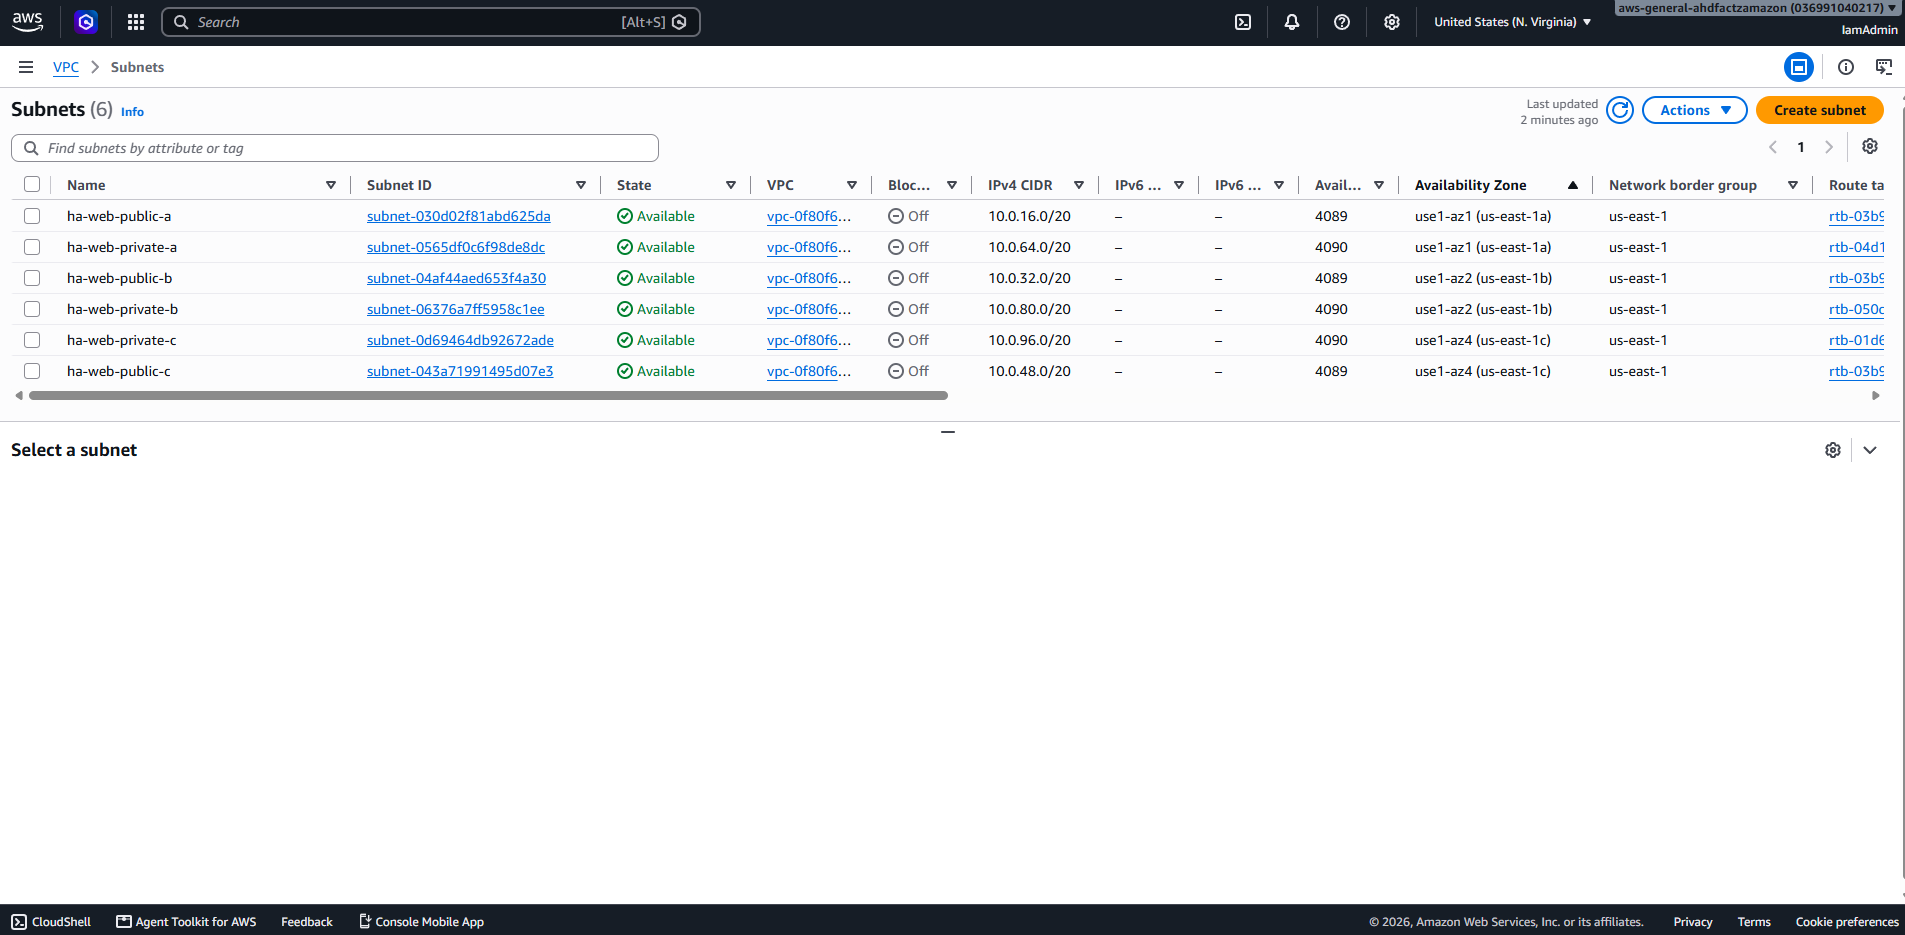
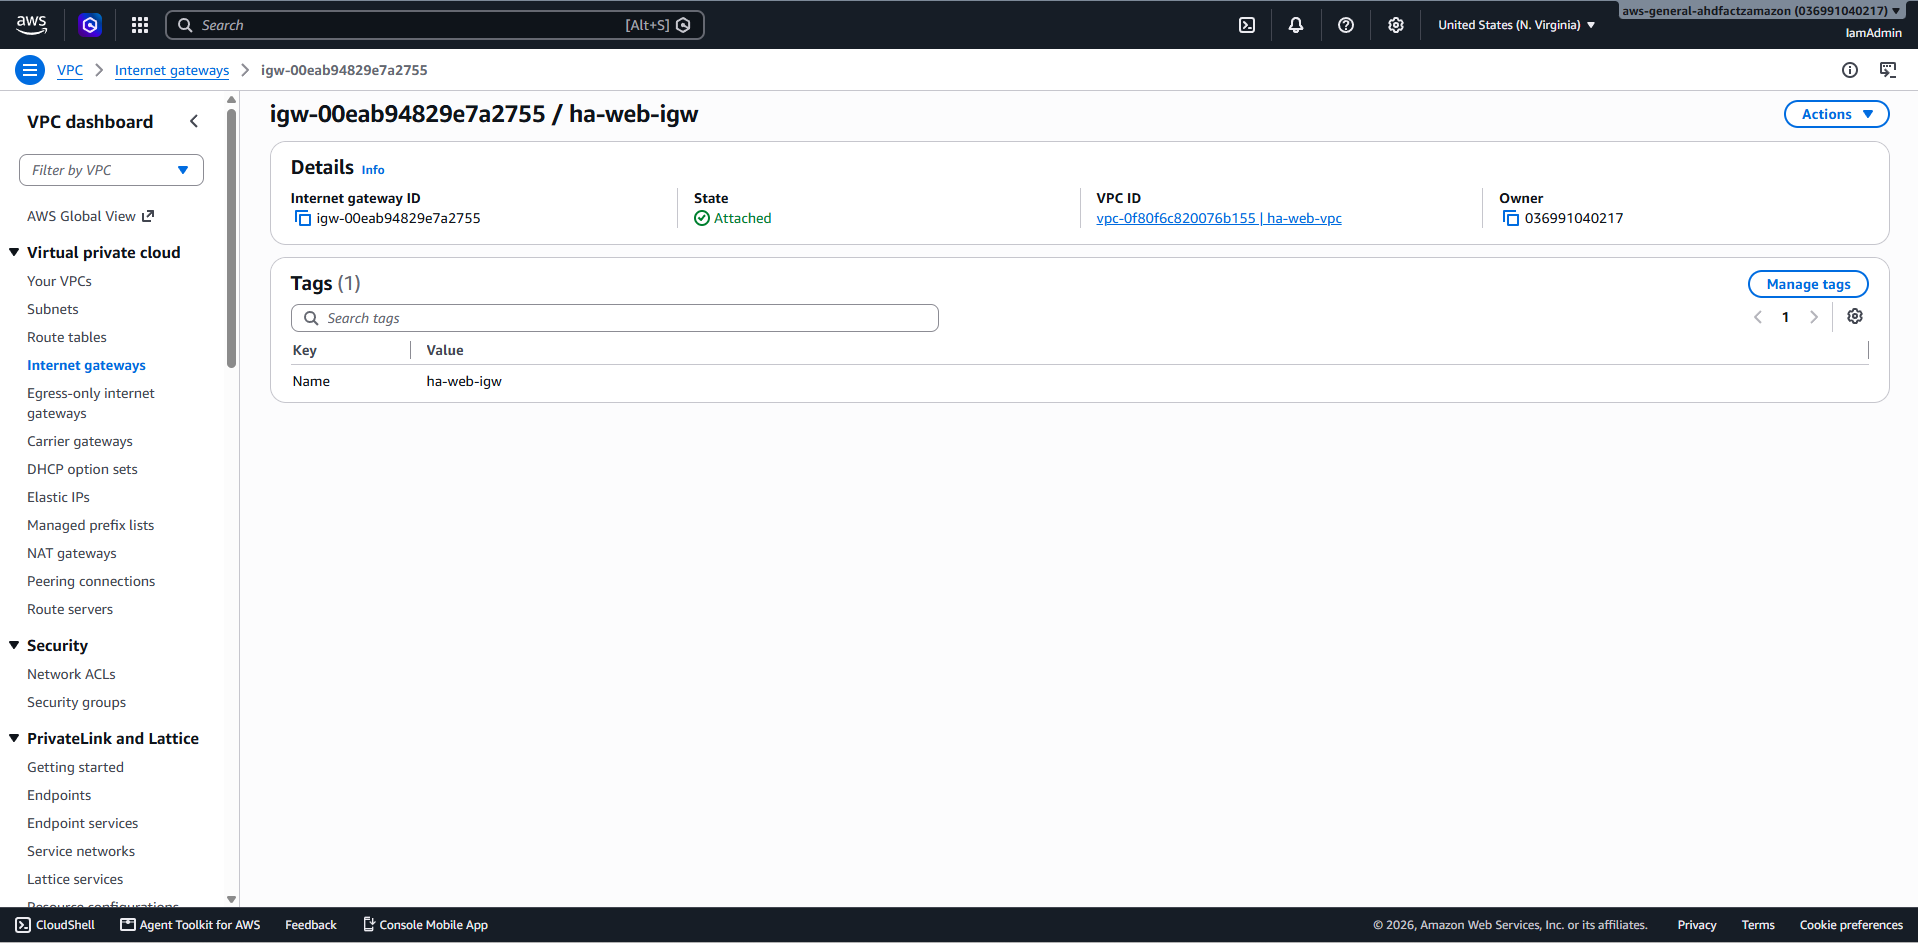
To make that possible, I attached an Internet Gateway to the VPC.
That gives the public subnets a path to the internet.
Configuring the Route Tables
After that, I configured the routing.
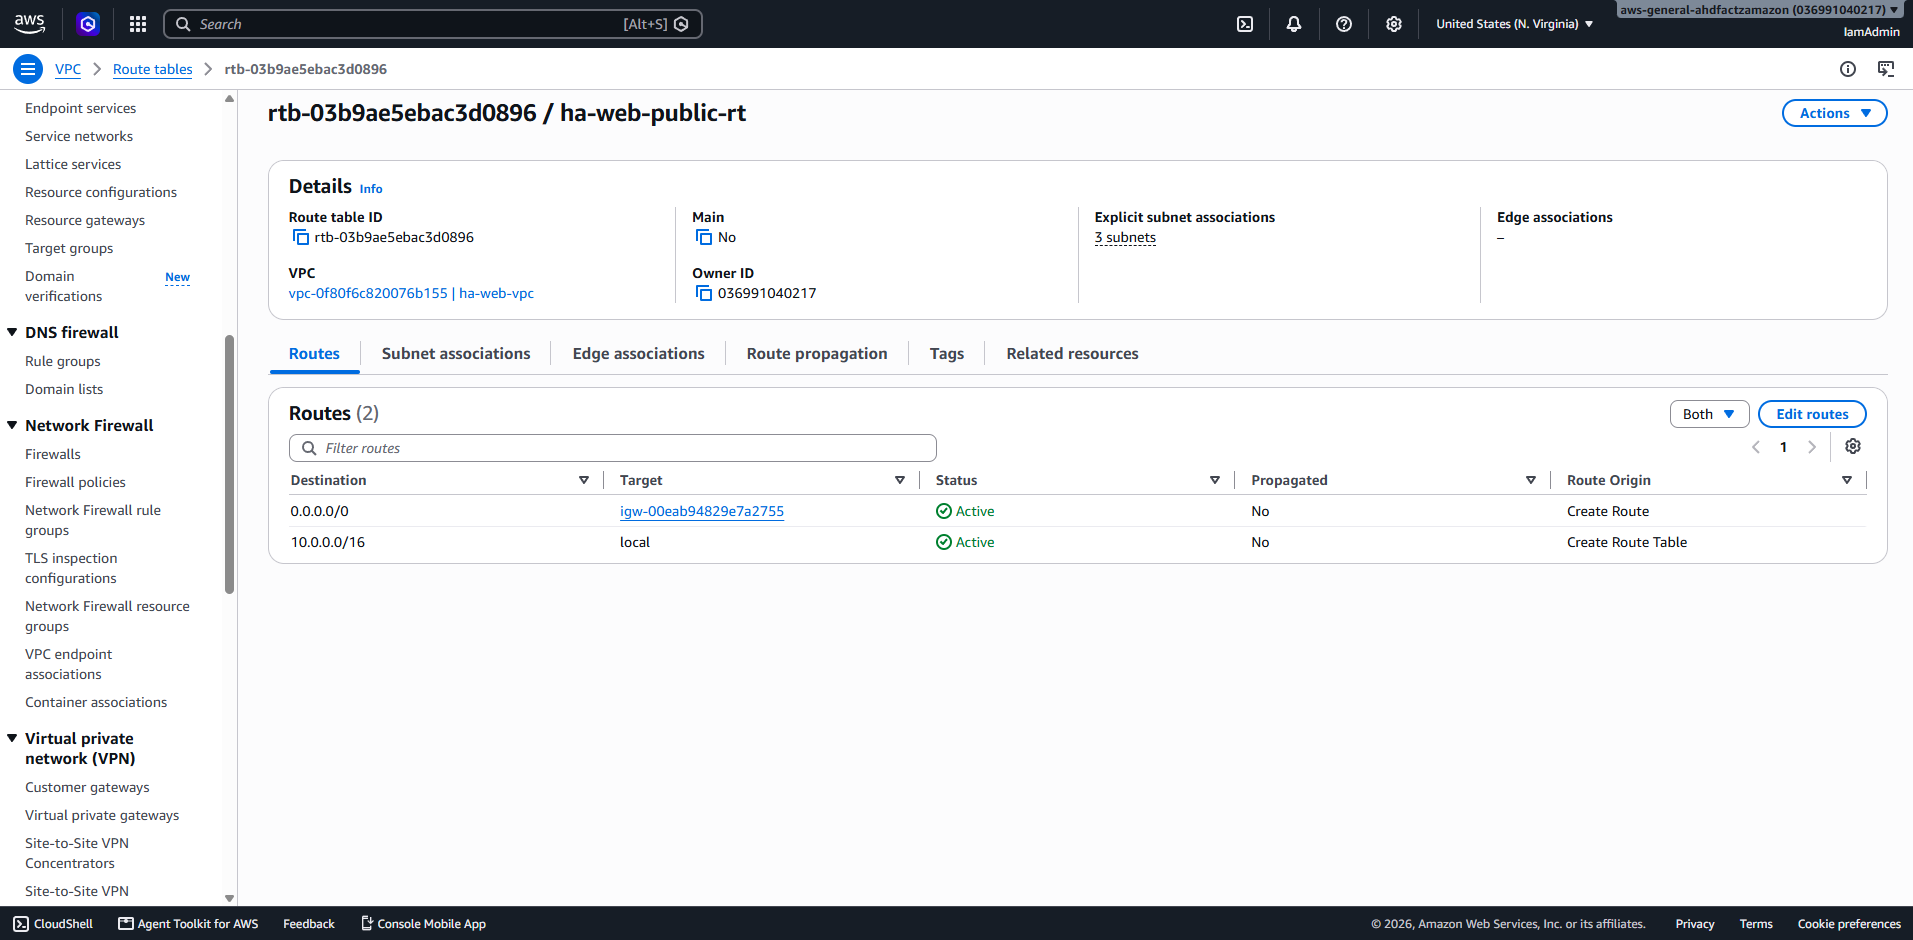
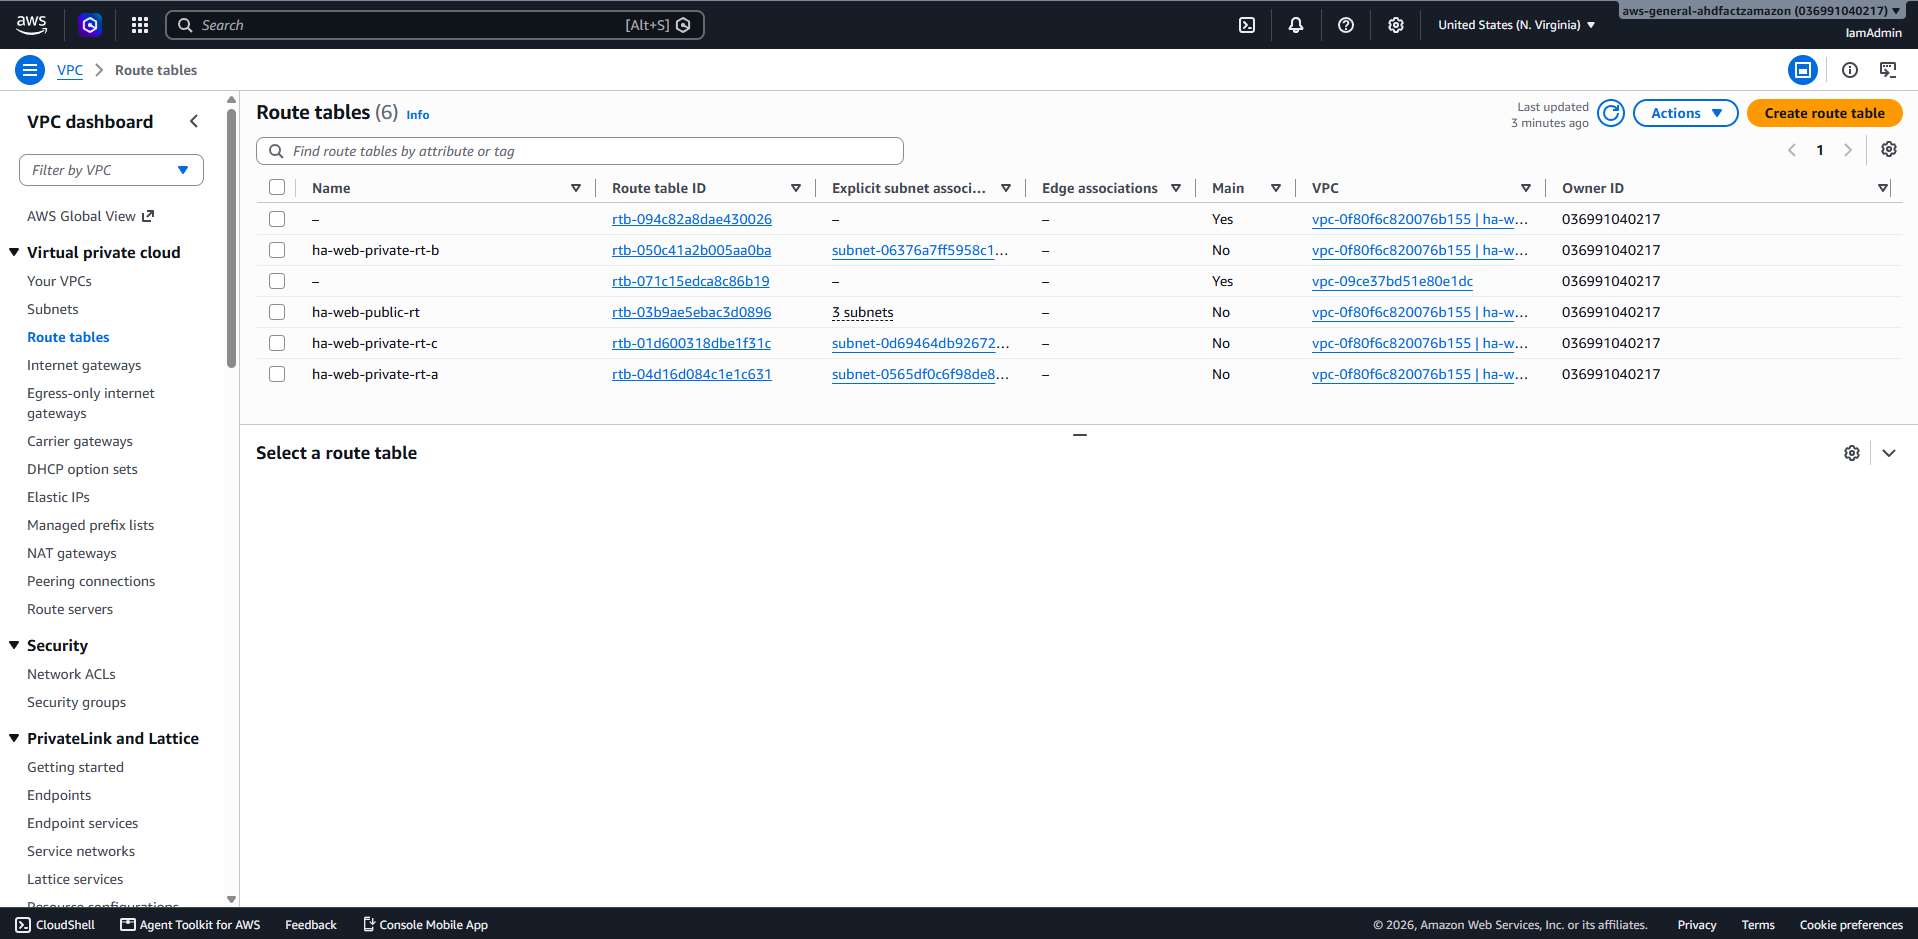
The public route table sends internet traffic through the Internet Gateway.
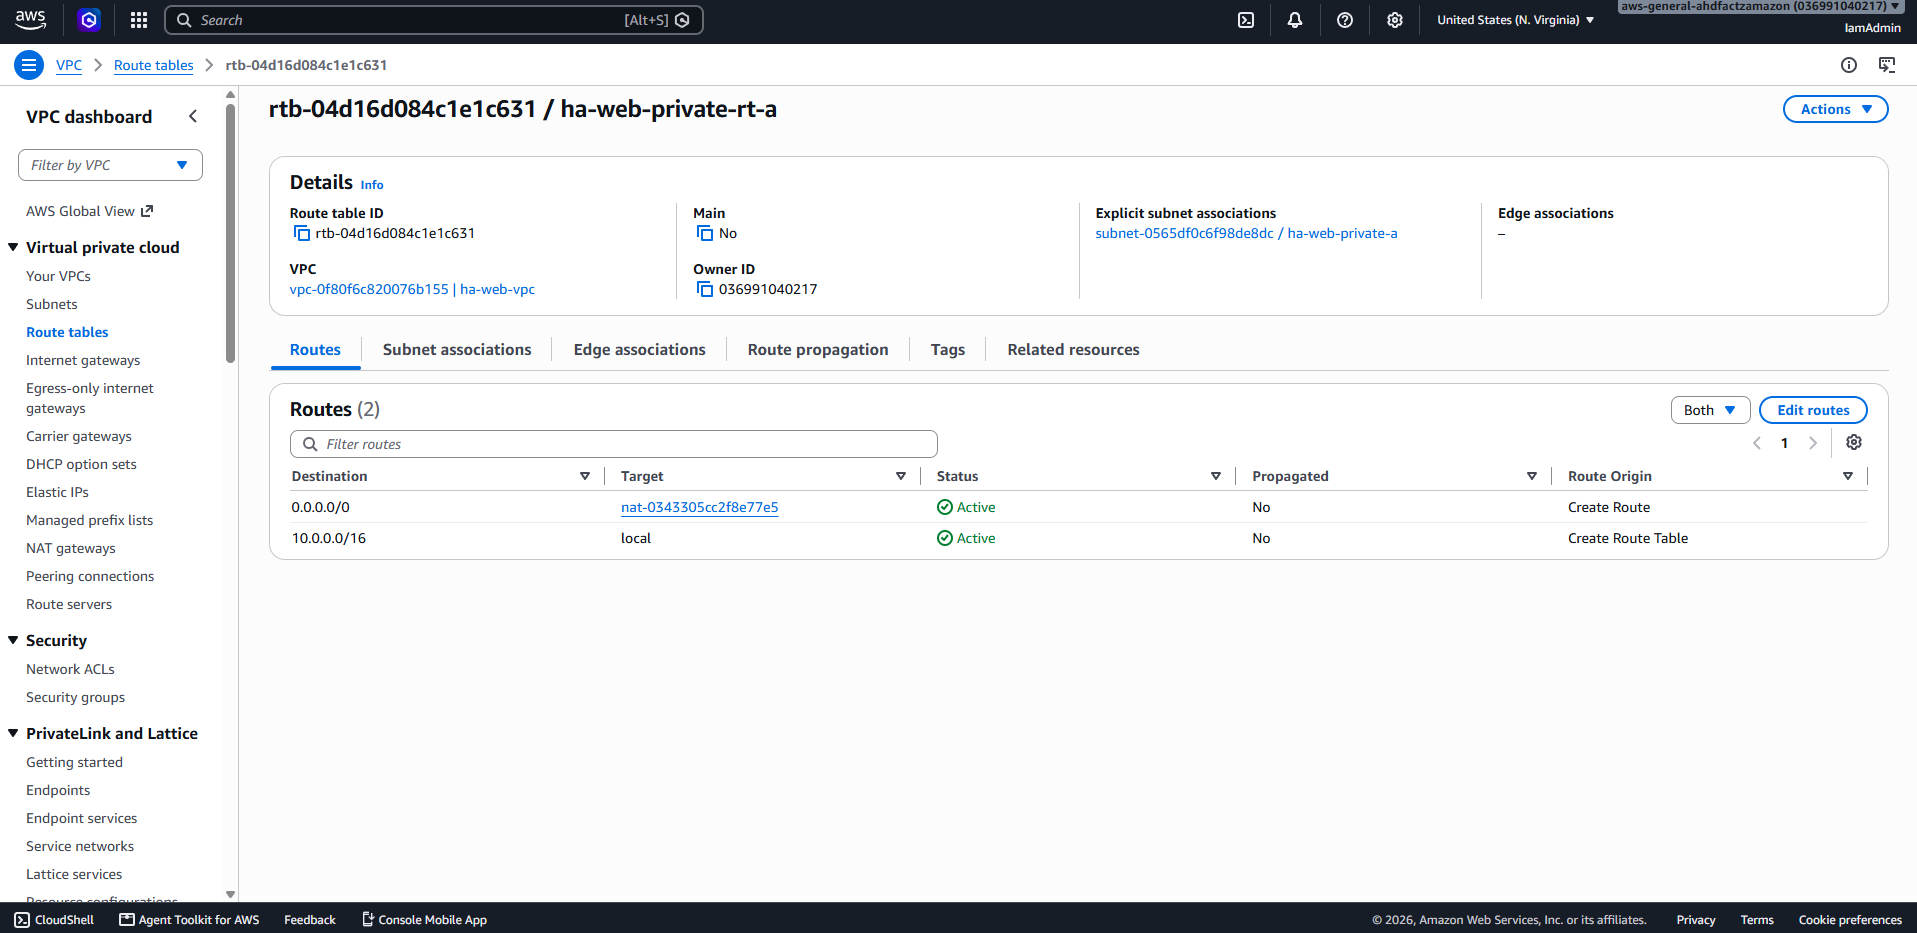
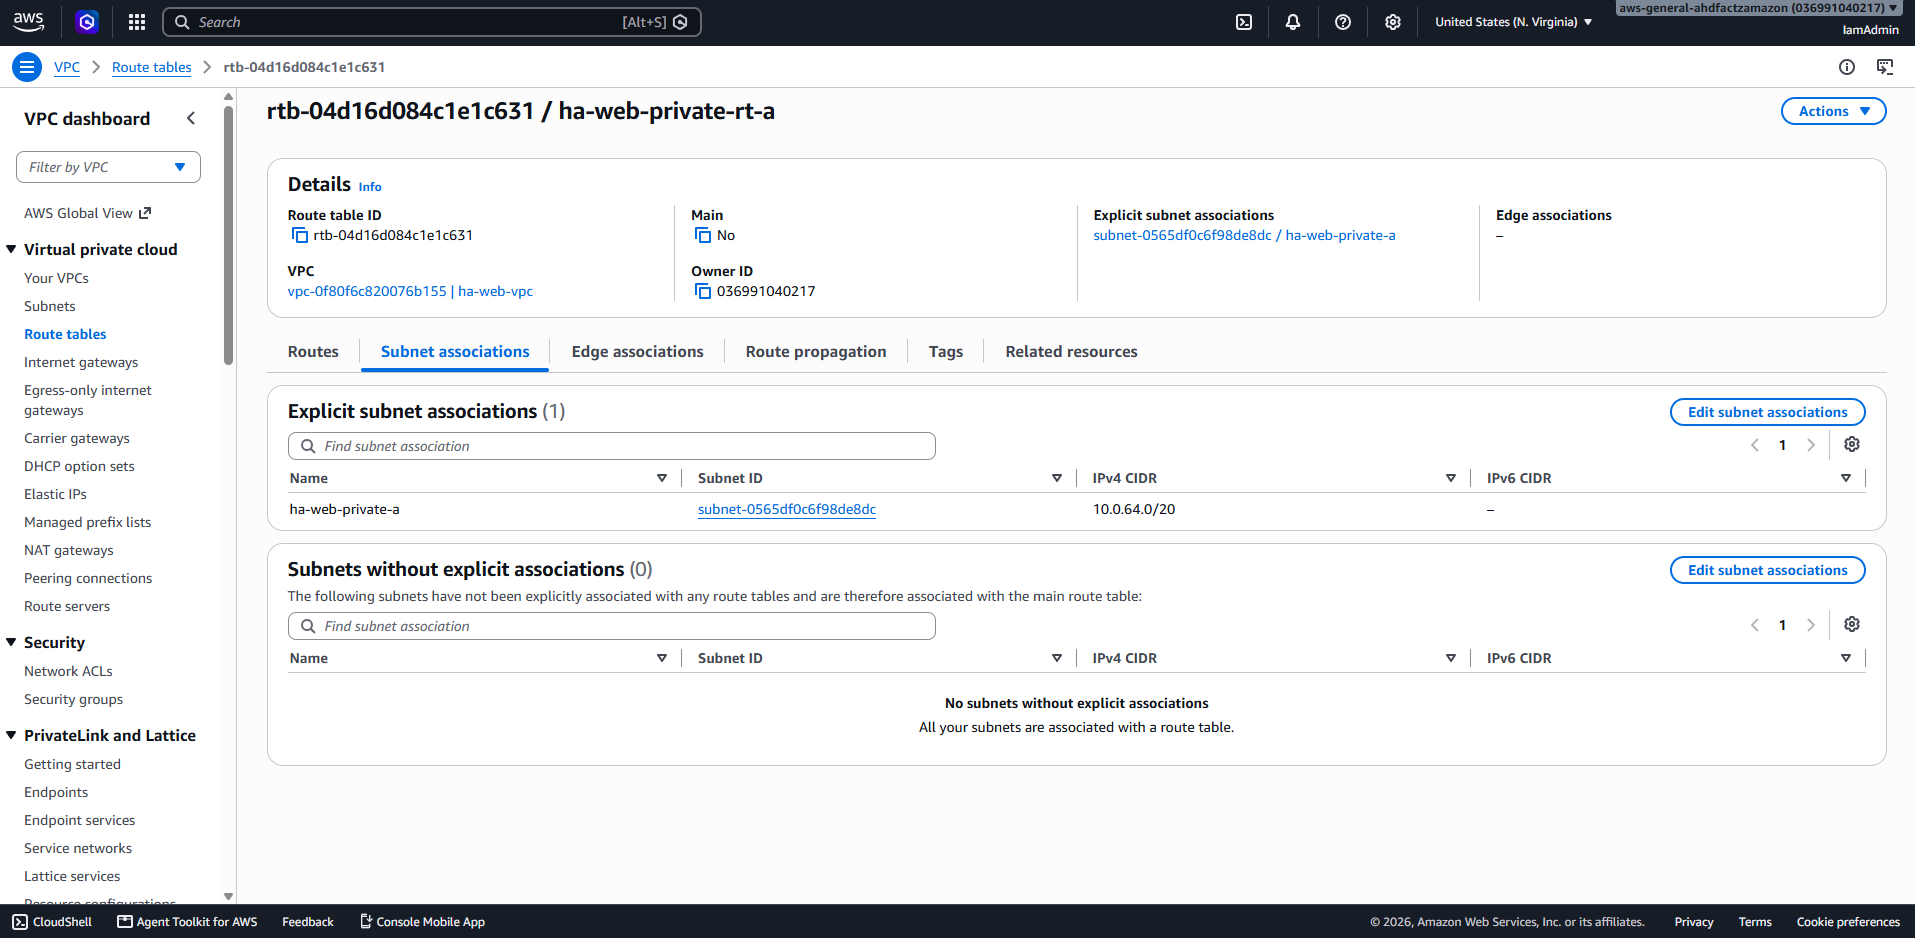
The private subnets don't have direct internet access. Instead, each private subnet uses its own route table that points to the NAT Gateway in the same Availability Zone.
This setup follows AWS best practices because every Availability Zone remains independent.
NAT Gateways
Since the EC2 instances are running in private subnets, they don't have public IP addresses.
That means they can't reach the internet directly.
They still need internet access for things like downloading packages, installing updates, and communicating with AWS services.
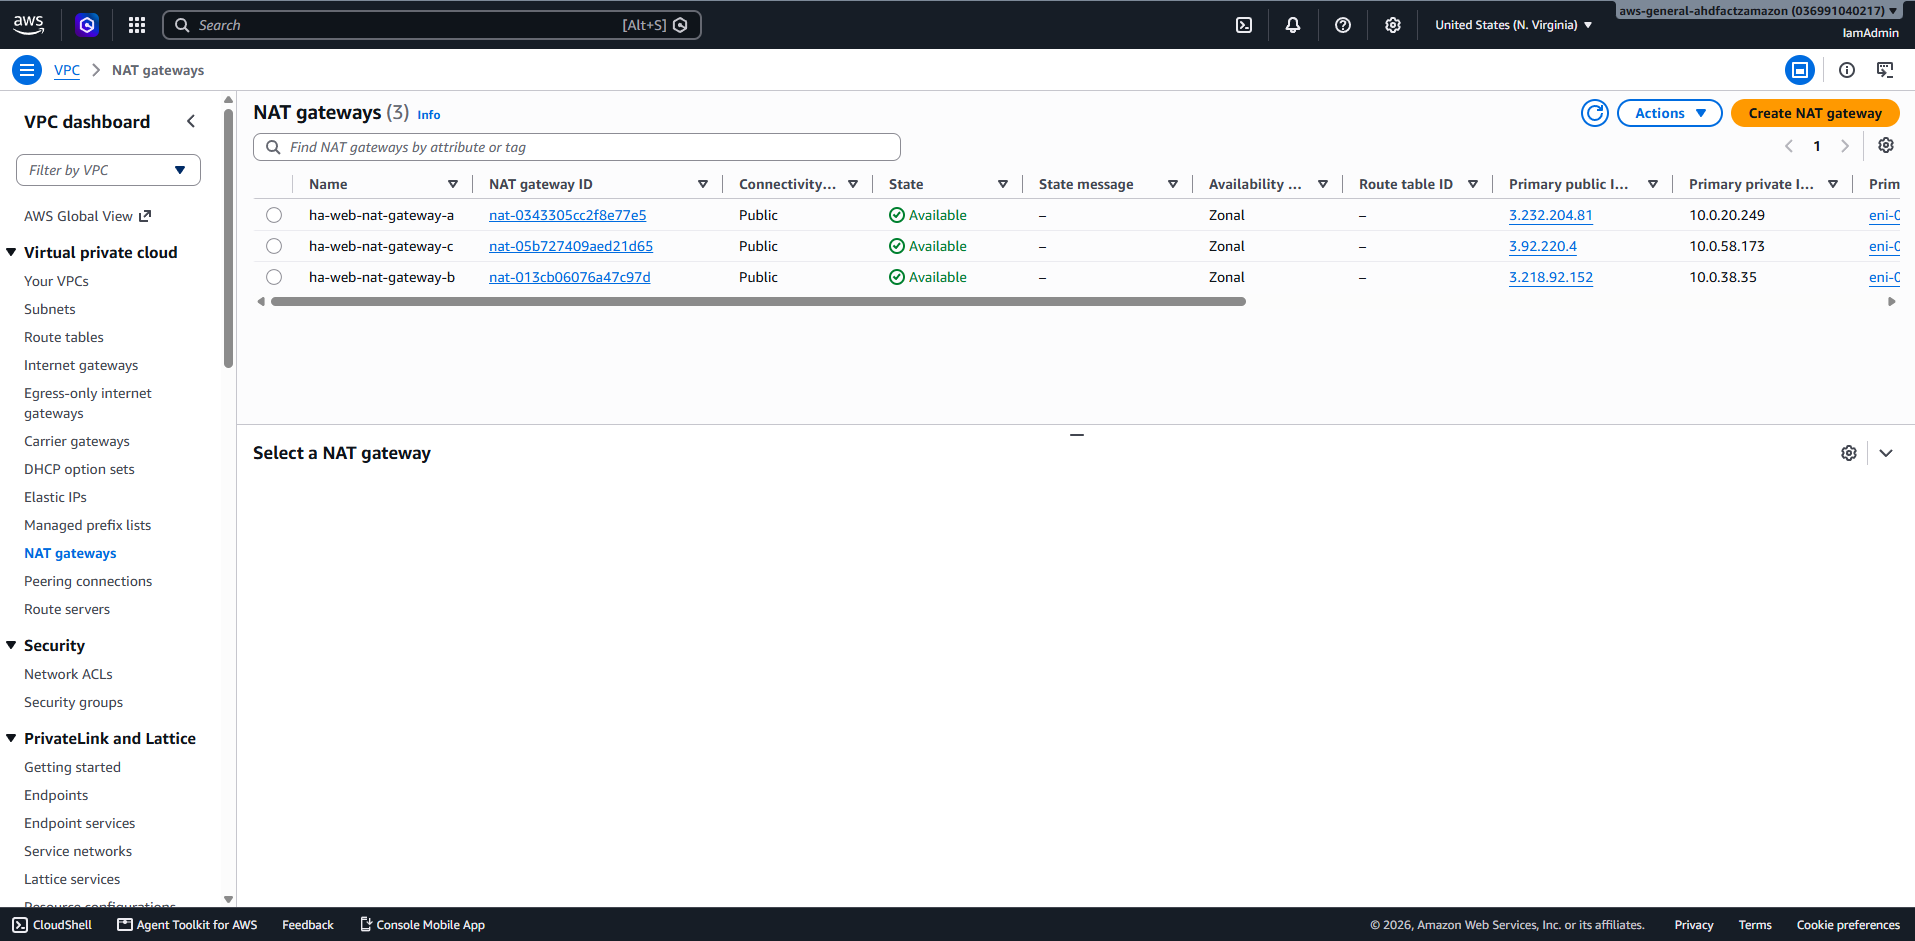
To solve that, I created one NAT Gateway inside each public subnet.
Now every private subnet can access the internet without exposing the EC2 instances to incoming traffic.
Locking Down Access with Security Groups
One thing I wanted to avoid was exposing the EC2 instances directly to the internet.
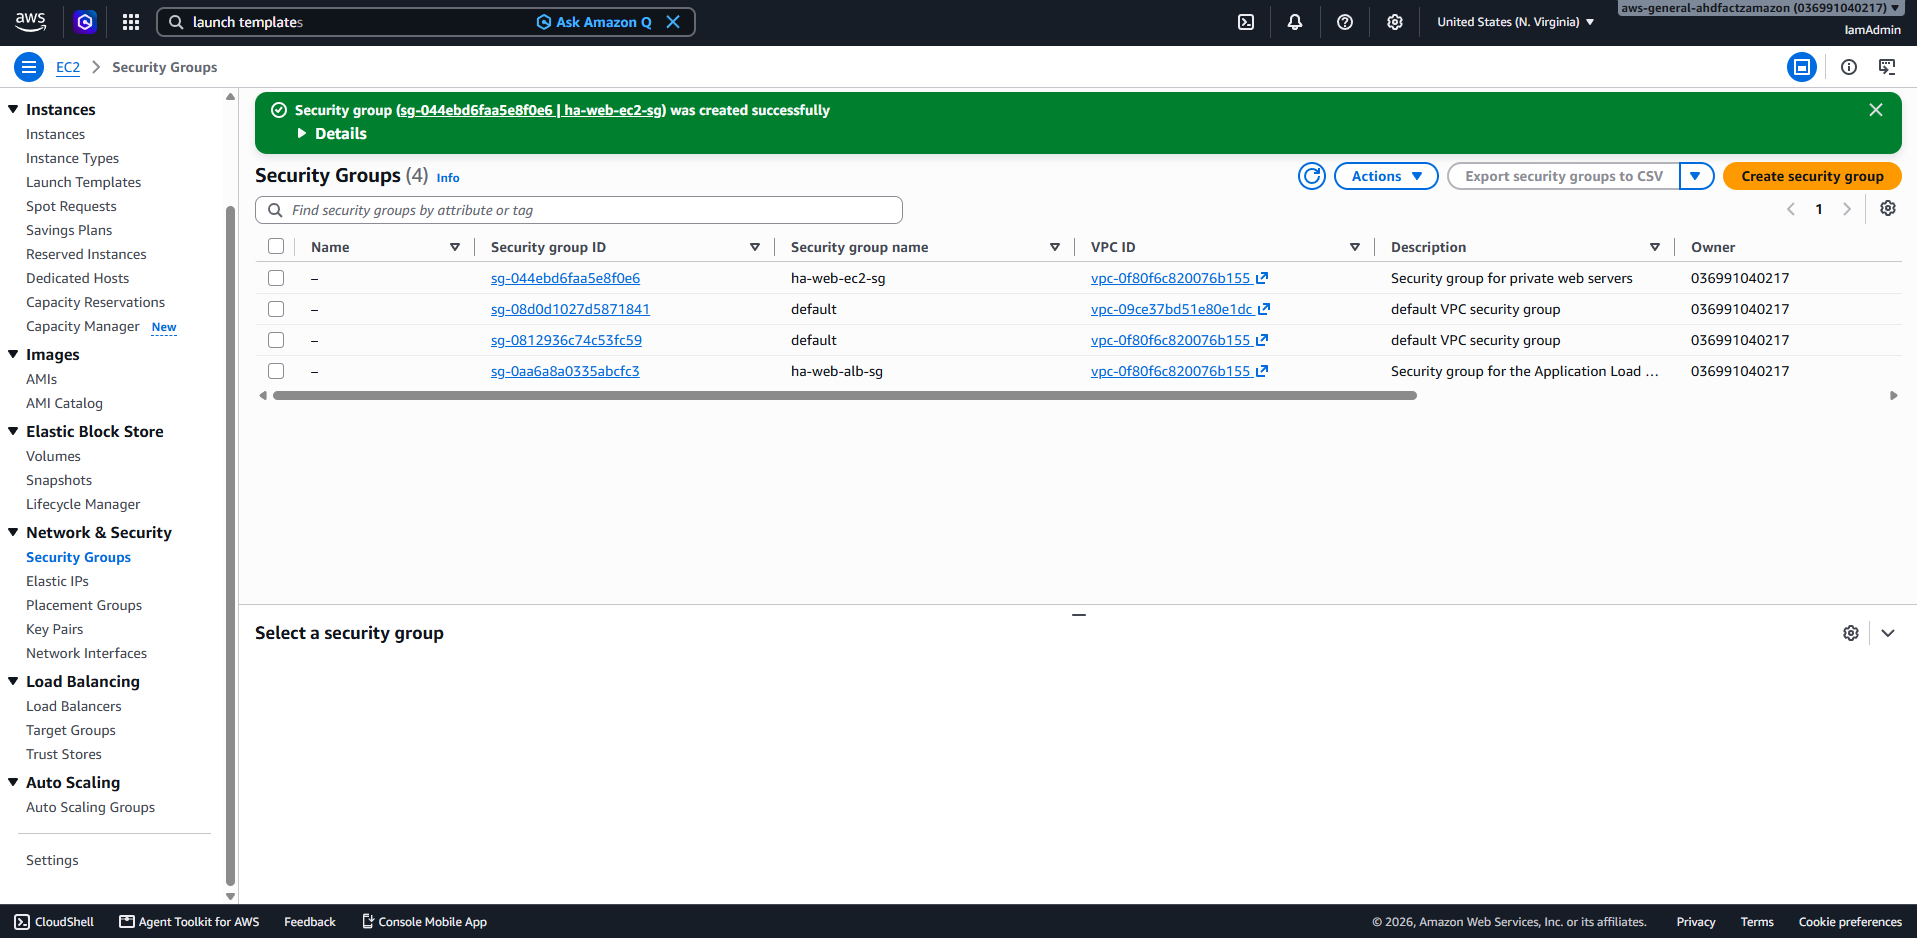
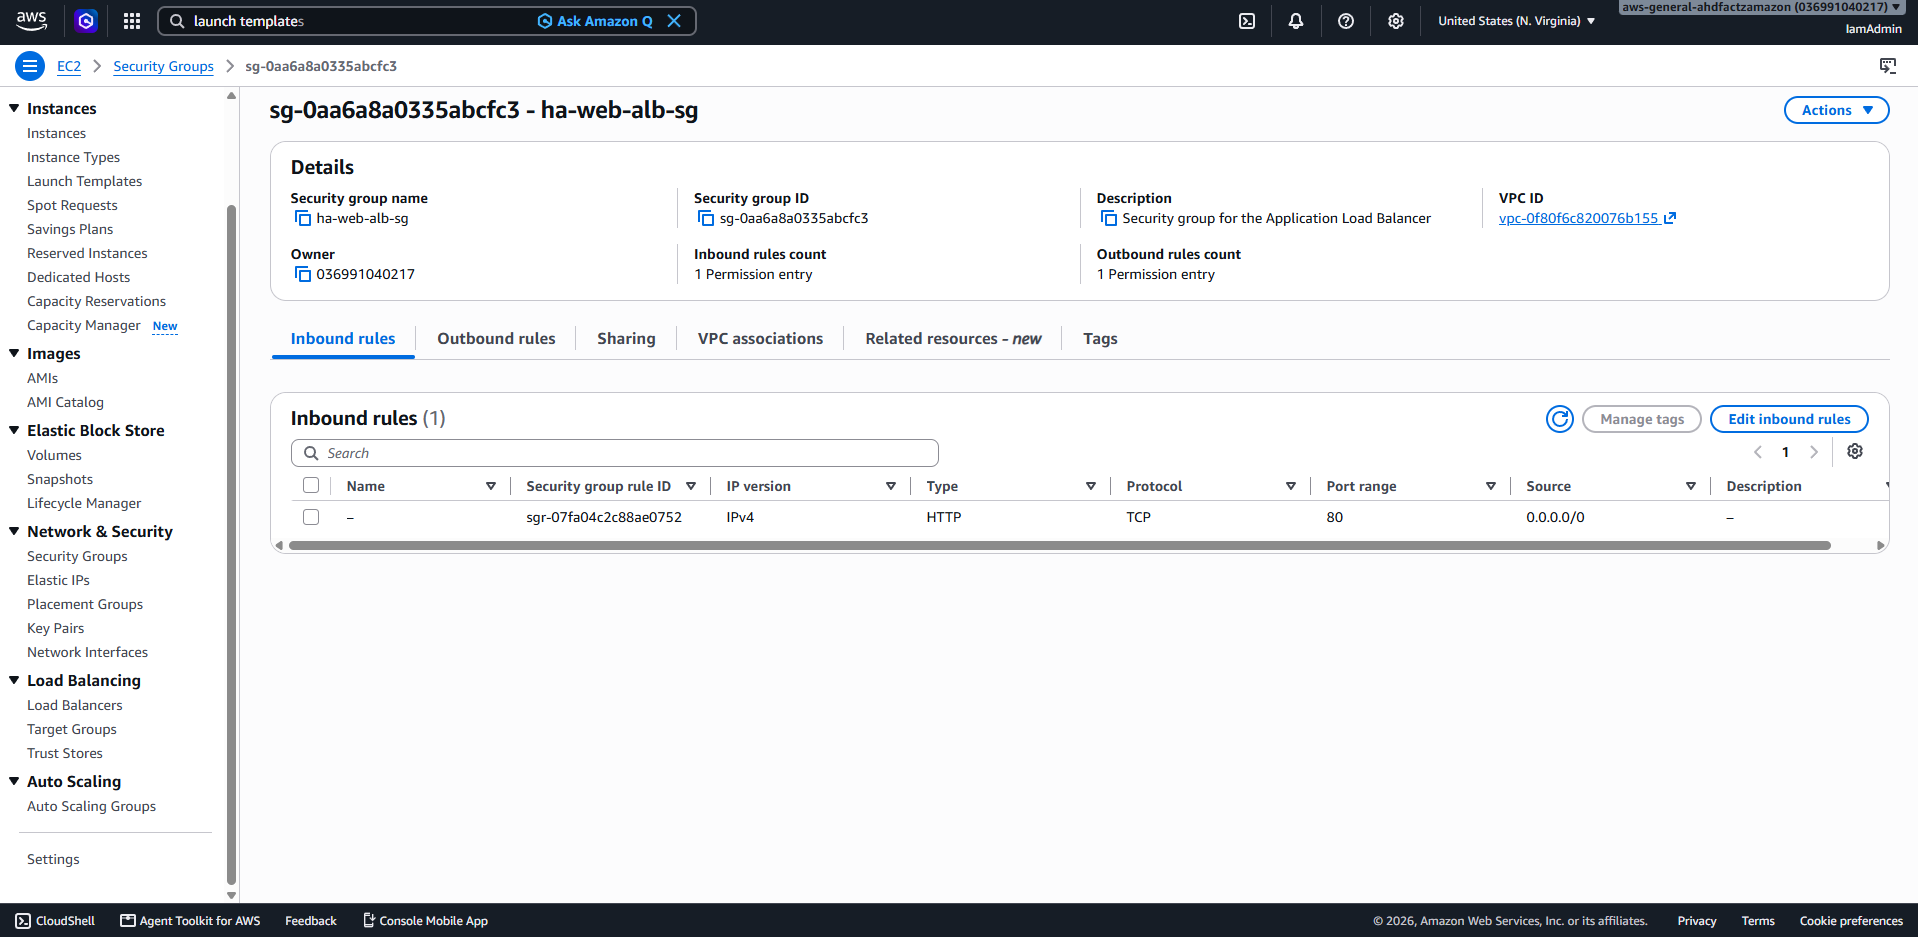
The Application Load Balancer accepts HTTP traffic from anywhere.
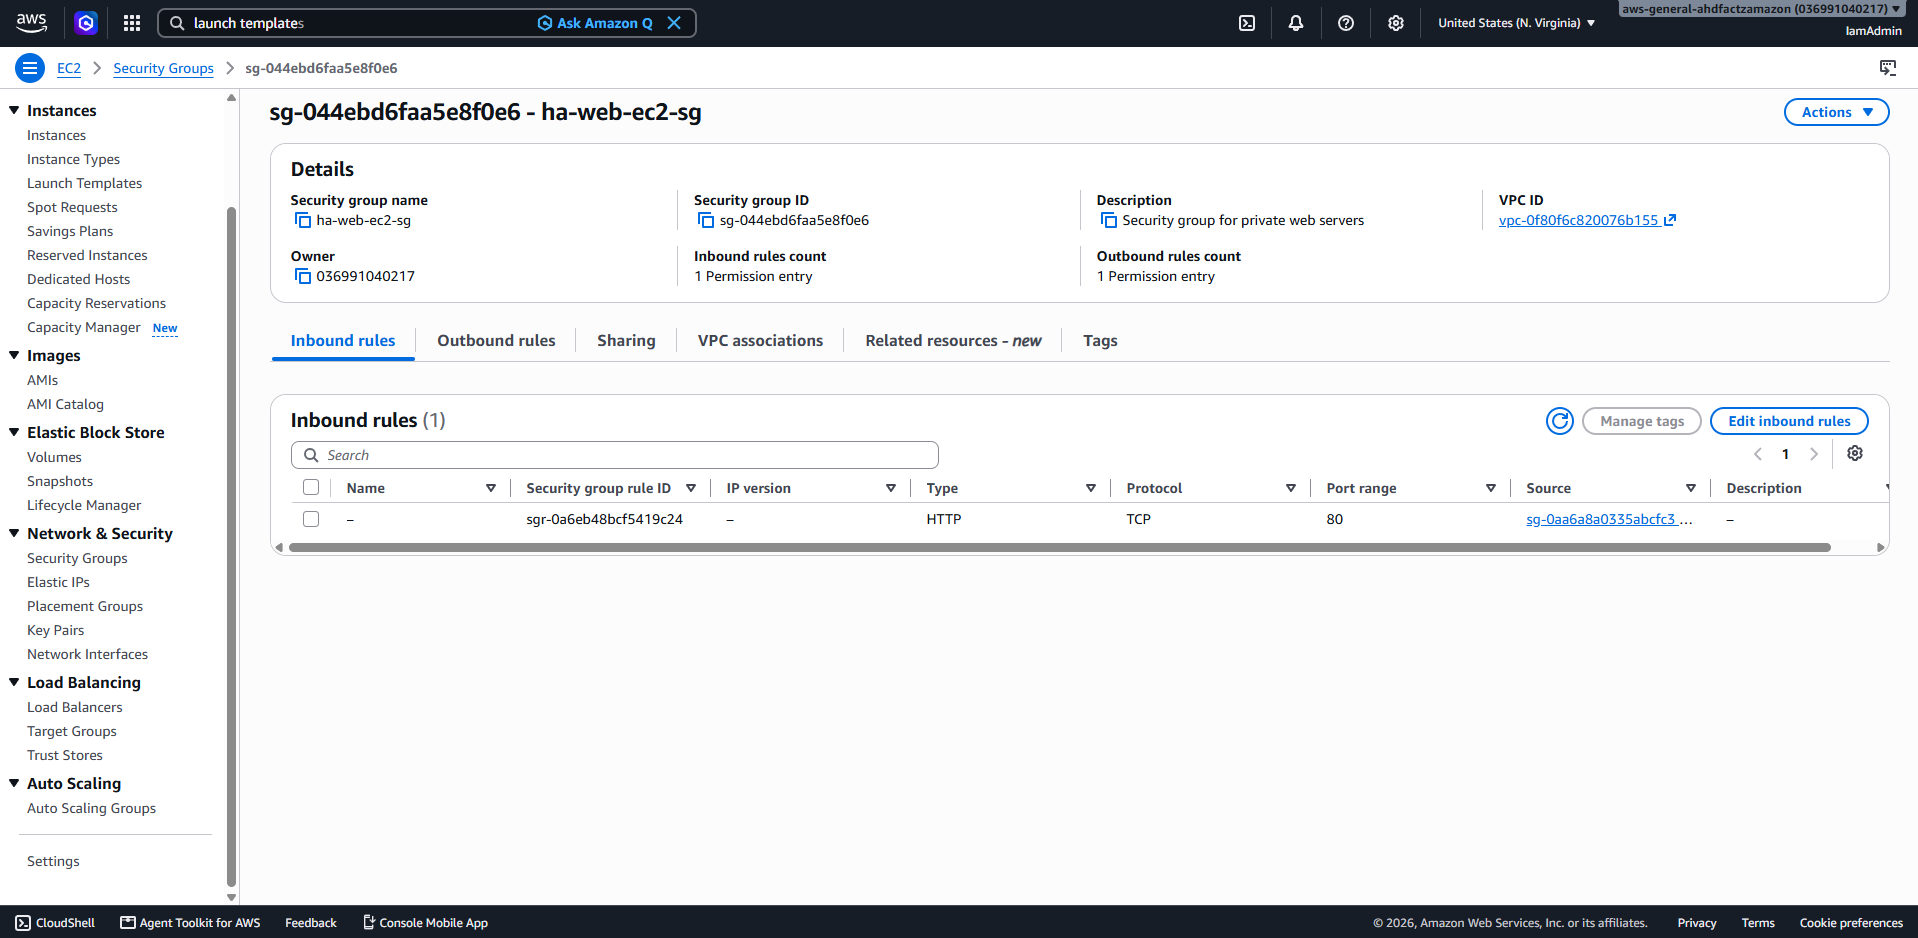
The EC2 instances only allow HTTP traffic coming from the ALB security group.
So even if someone knows the private IP of an EC2 instance, they still can't connect to it directly.
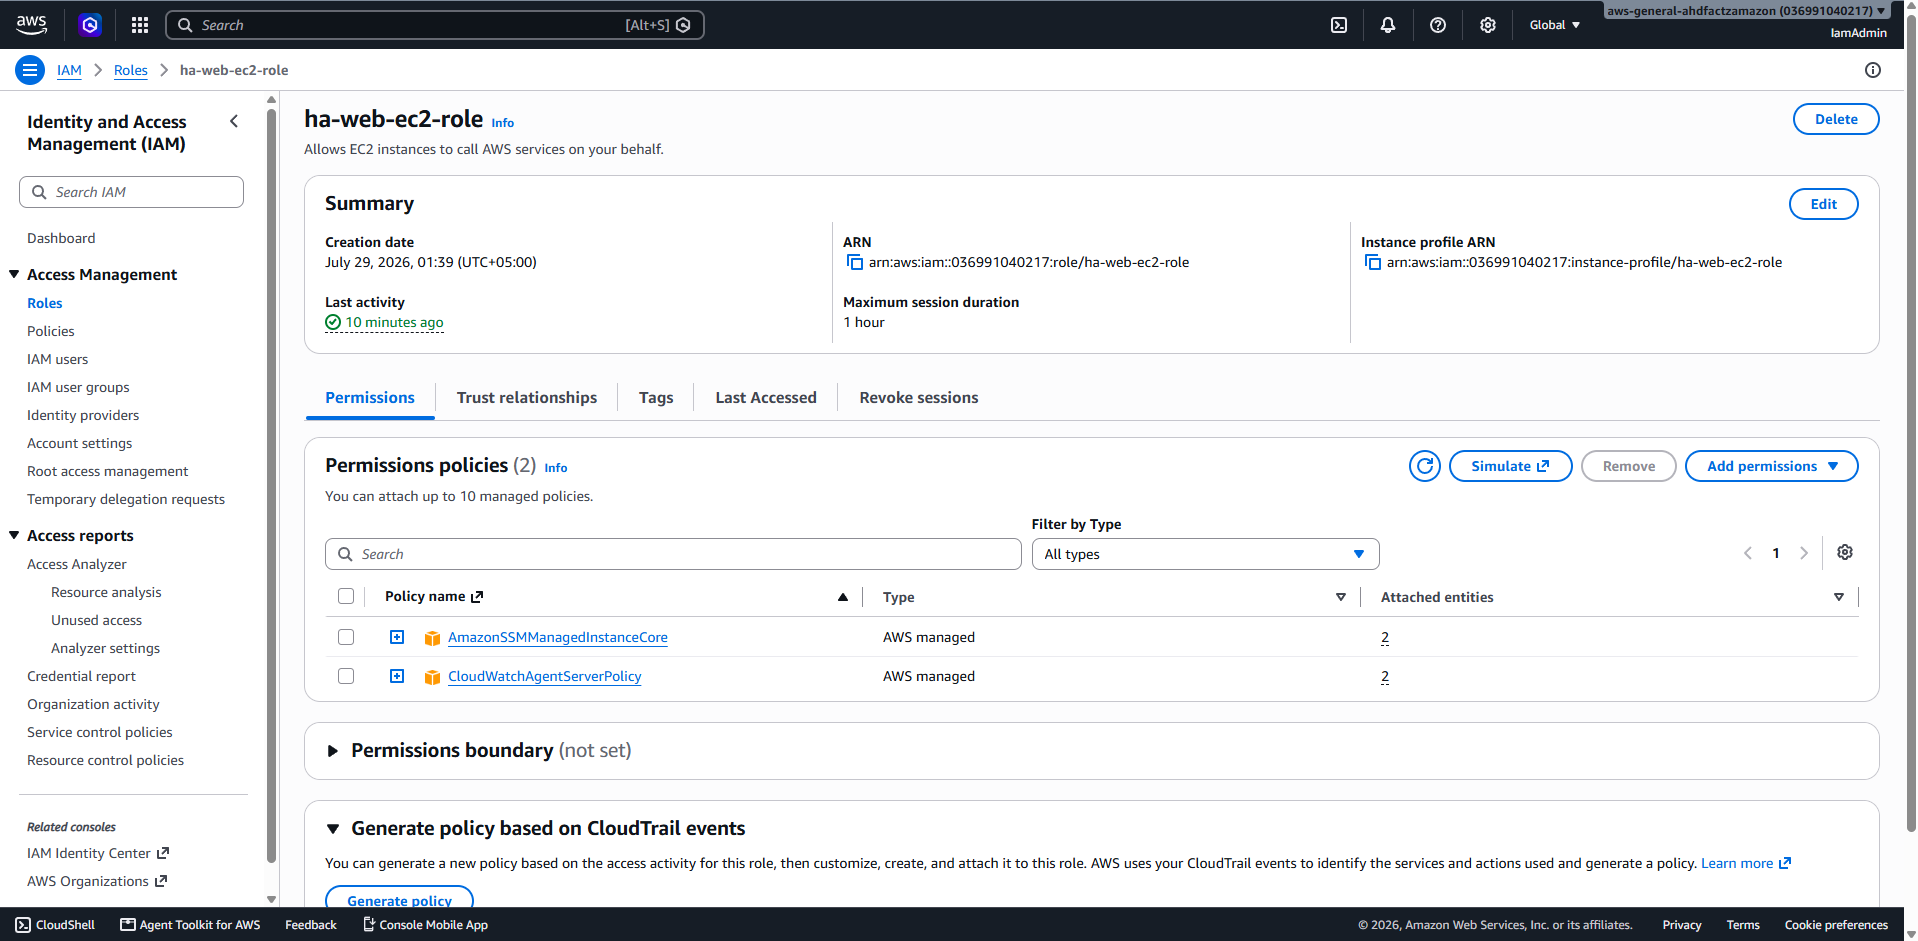
I also configured an IAM role so I could connect to the instances using AWS Systems Manager Session Manager instead of SSH.
That means there are no key pairs to manage and no need to leave port 22 open.
Creating the Launch Template
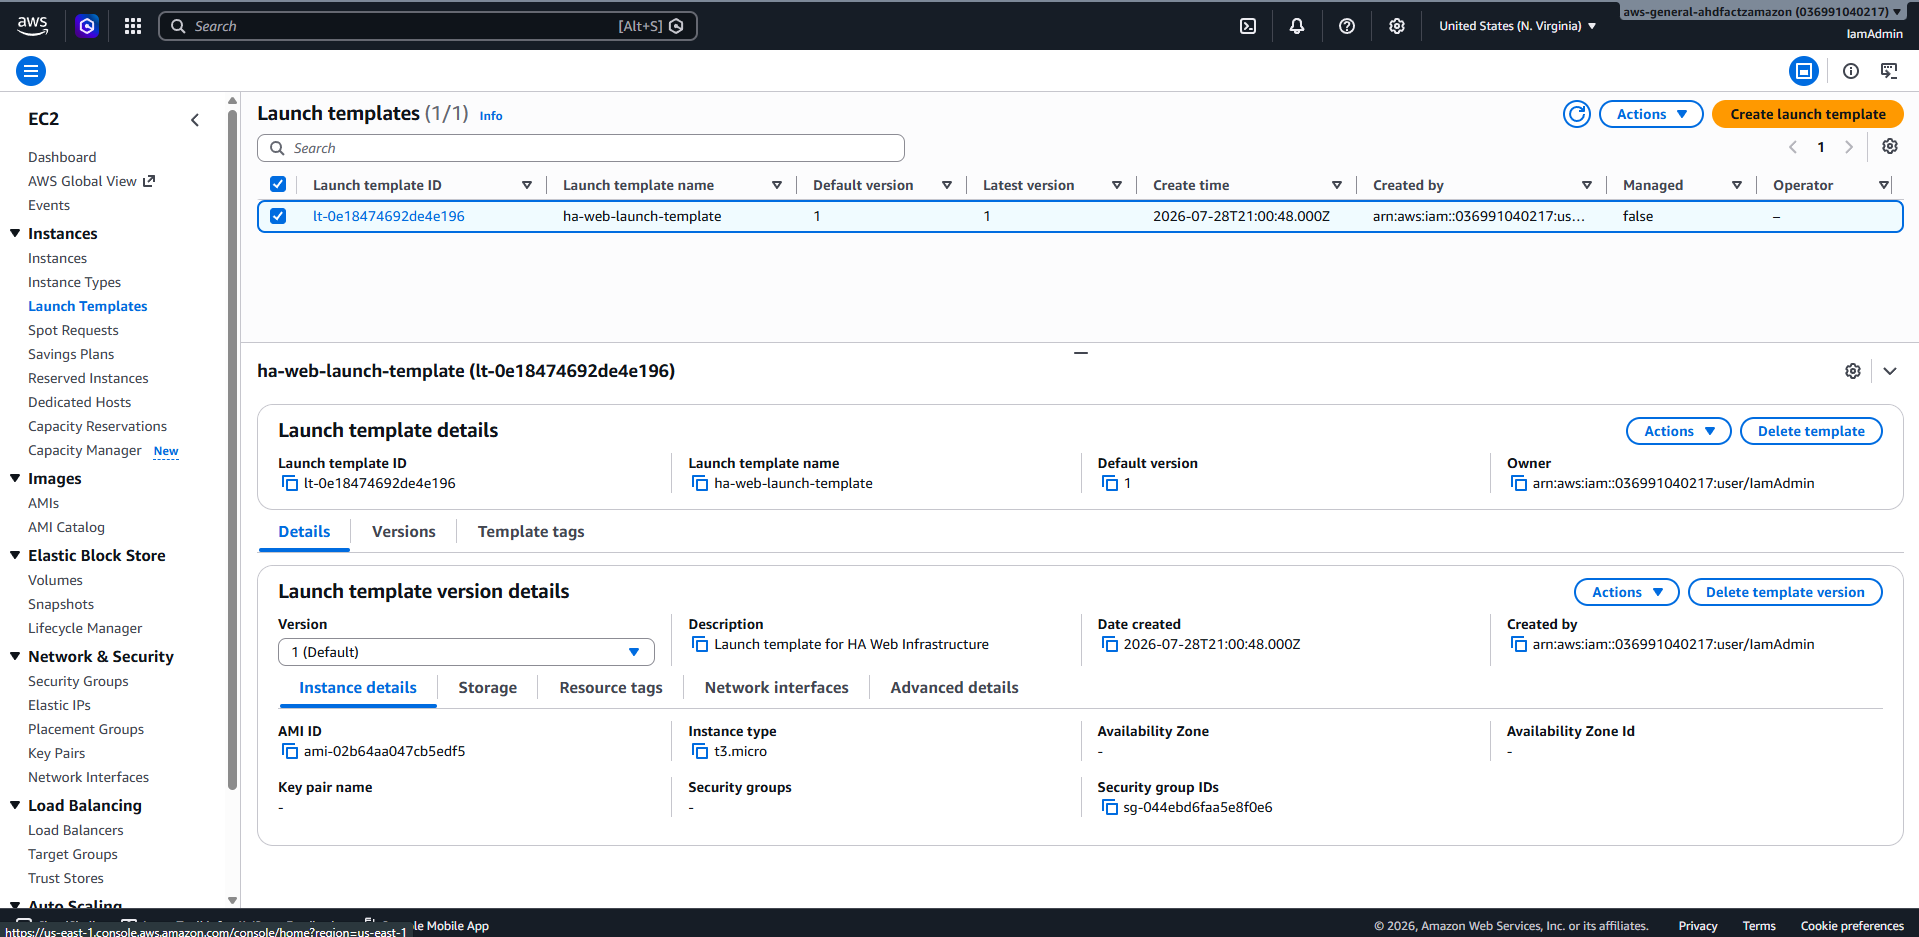
I knew the Auto Scaling Group would eventually be responsible for launching EC2 instances, so I created a Launch Template first.
The template includes everything a new instance needs.
That includes the AMI, instance type, security group, IAM role, and a User Data script.
The User Data installs Apache automatically and creates a simple webpage that displays information about the running instance. That made it really easy to see which instance was serving each request later on.
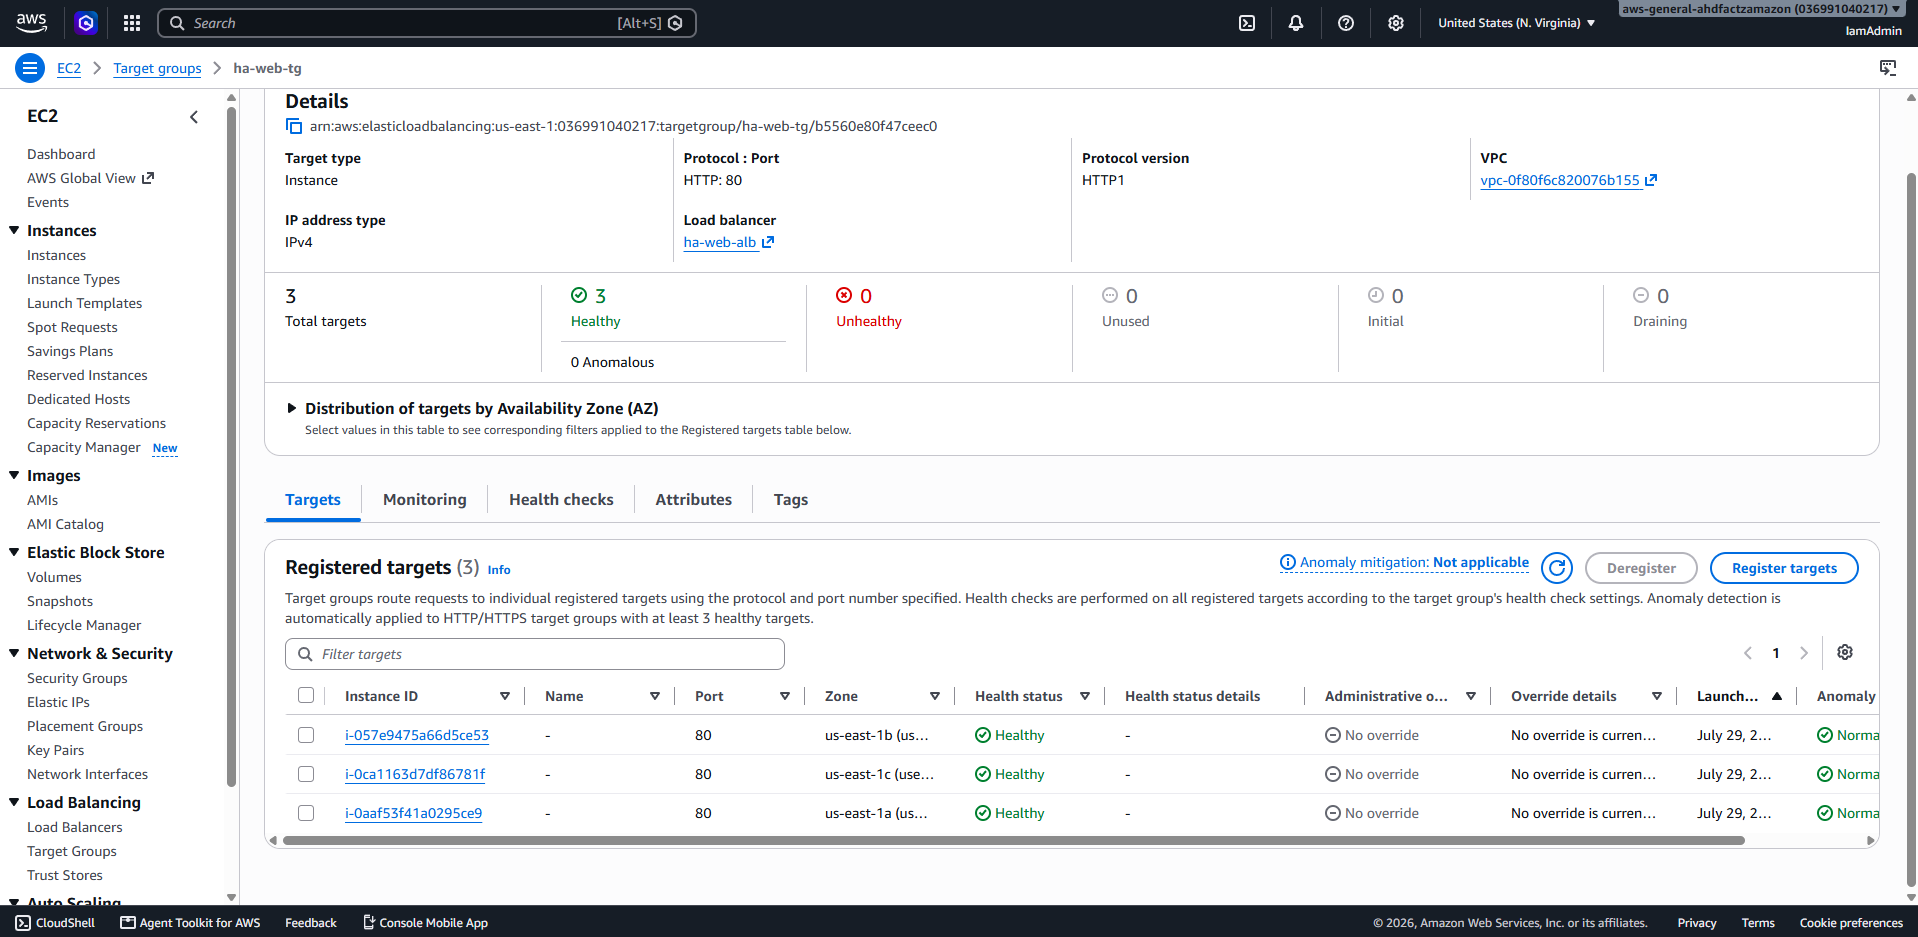
Creating the Target Group
Before the load balancer can send traffic anywhere, it needs a Target Group.
The Target Group keeps track of the EC2 instances and continuously performs health checks.
Only healthy instances receive traffic.
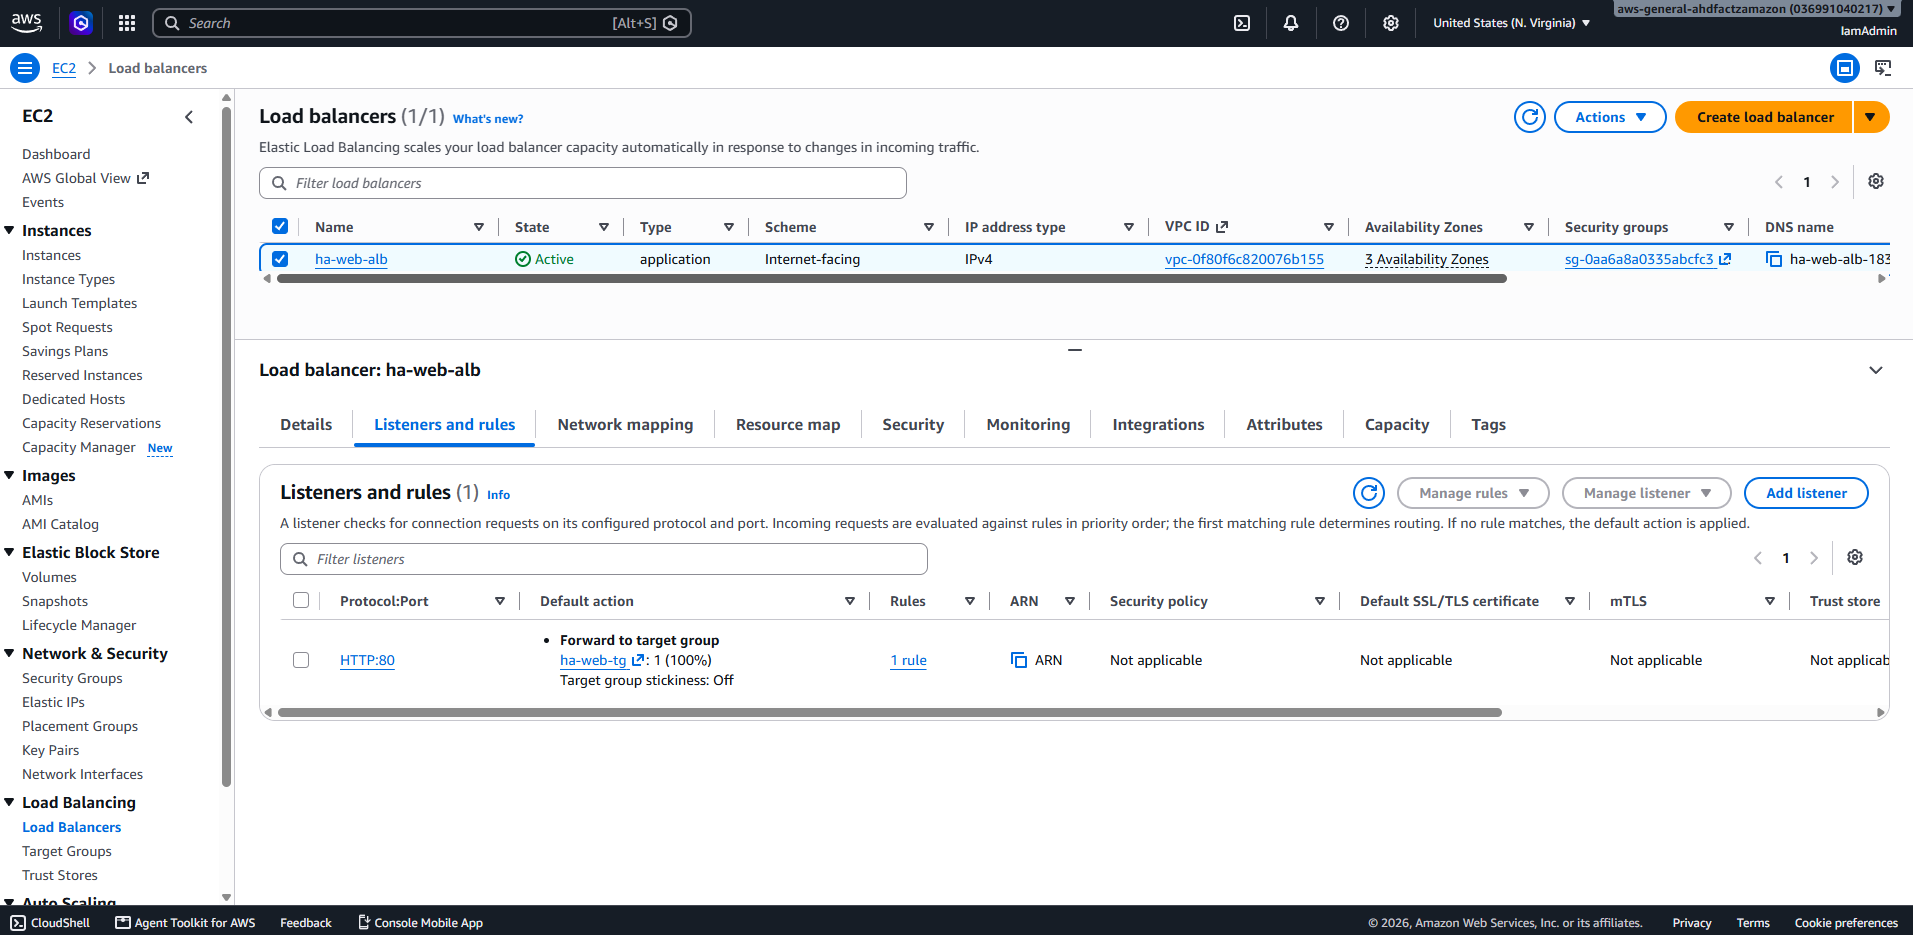
This was also the point where I finally understood that the Application Load Balancer doesn't send traffic directly to EC2 instances. It sends traffic to the Target Group, and the Target Group decides which healthy instance should receive the request.
Creating the Application Load Balancer
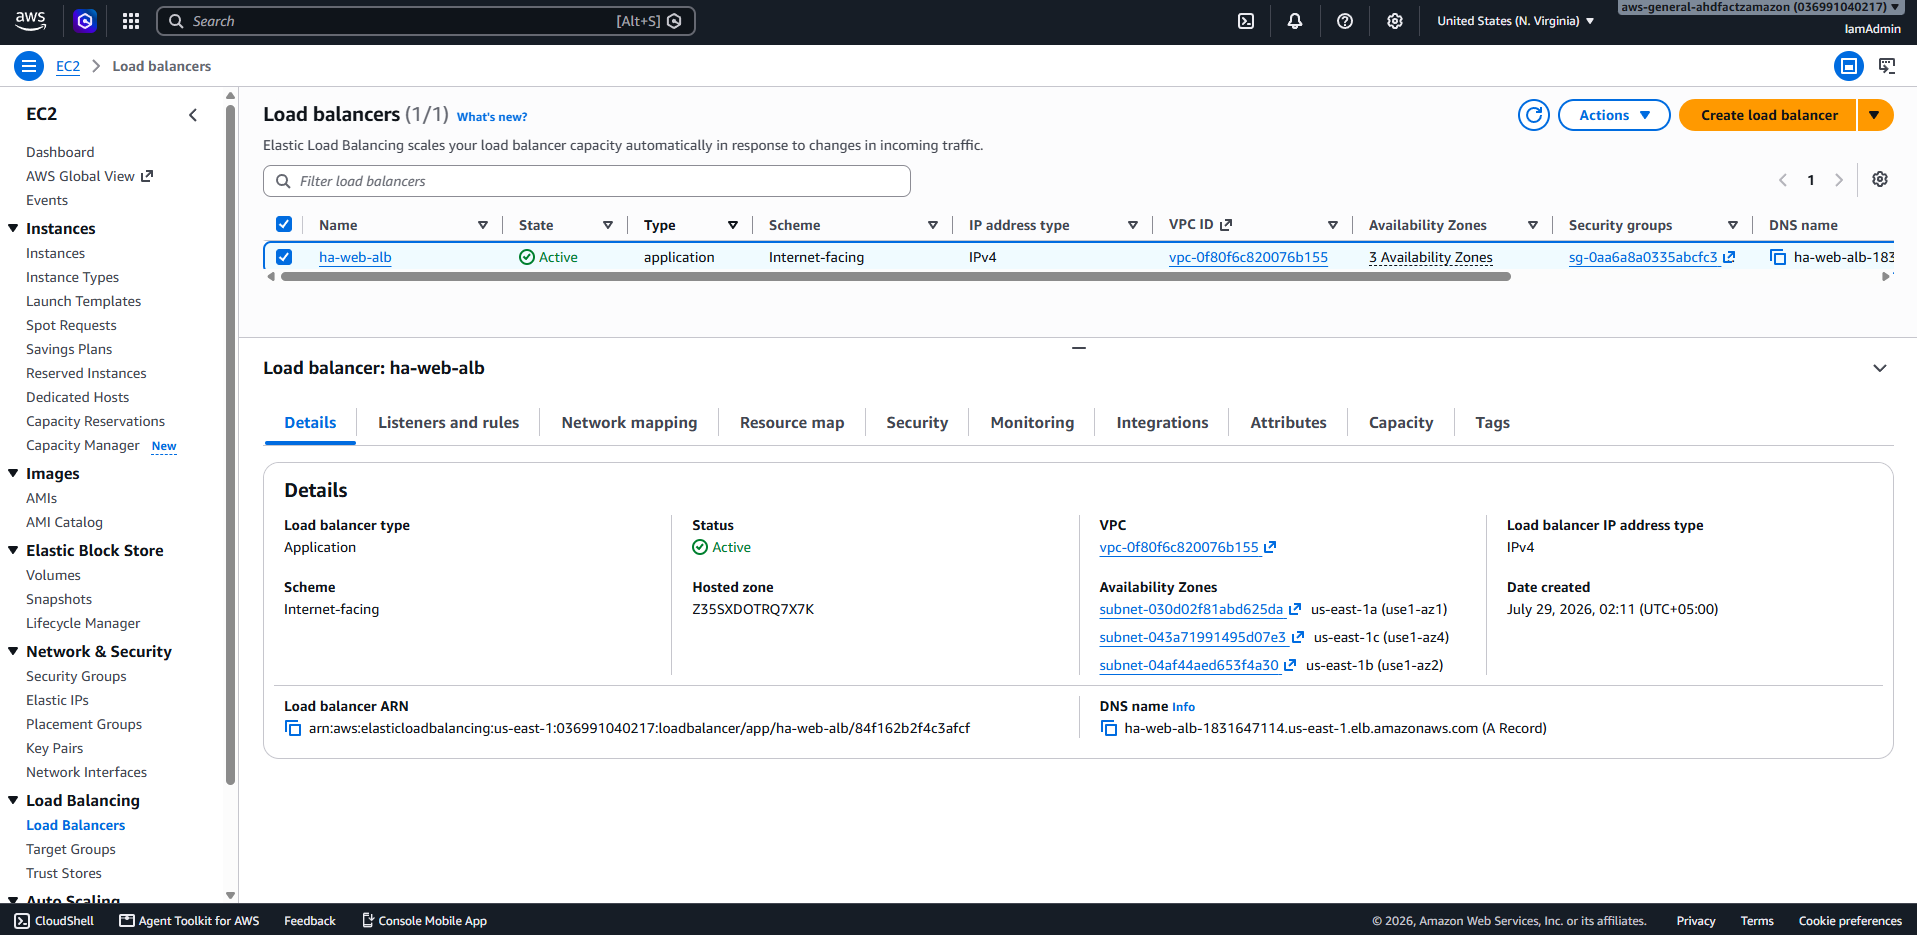
Next, I created an internet-facing Application Load Balancer.
I placed it across all three public subnets and connected it to the Target Group.
From this point on, users only interact with the load balancer. They never connect directly to the EC2 instances.
Launching the Auto Scaling Group
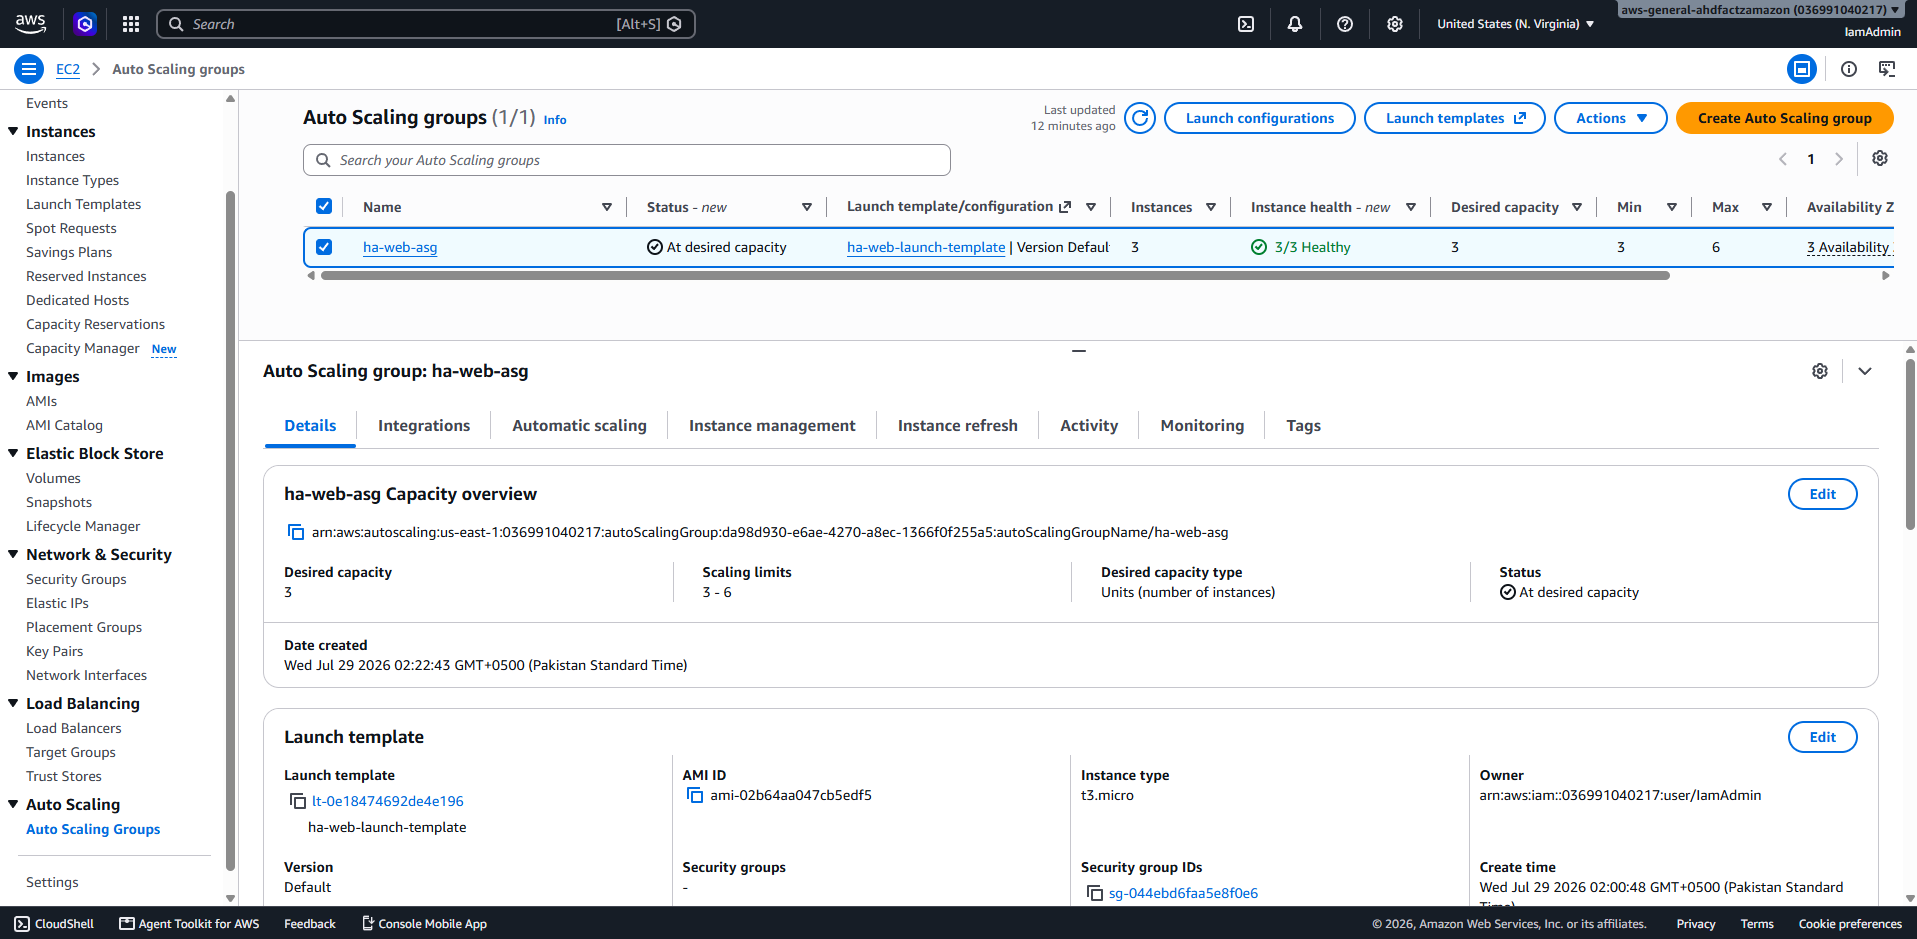
Finally, I created the Auto Scaling Group.
I configured it with a desired capacity of three instances, one minimum of three, and a maximum of six.
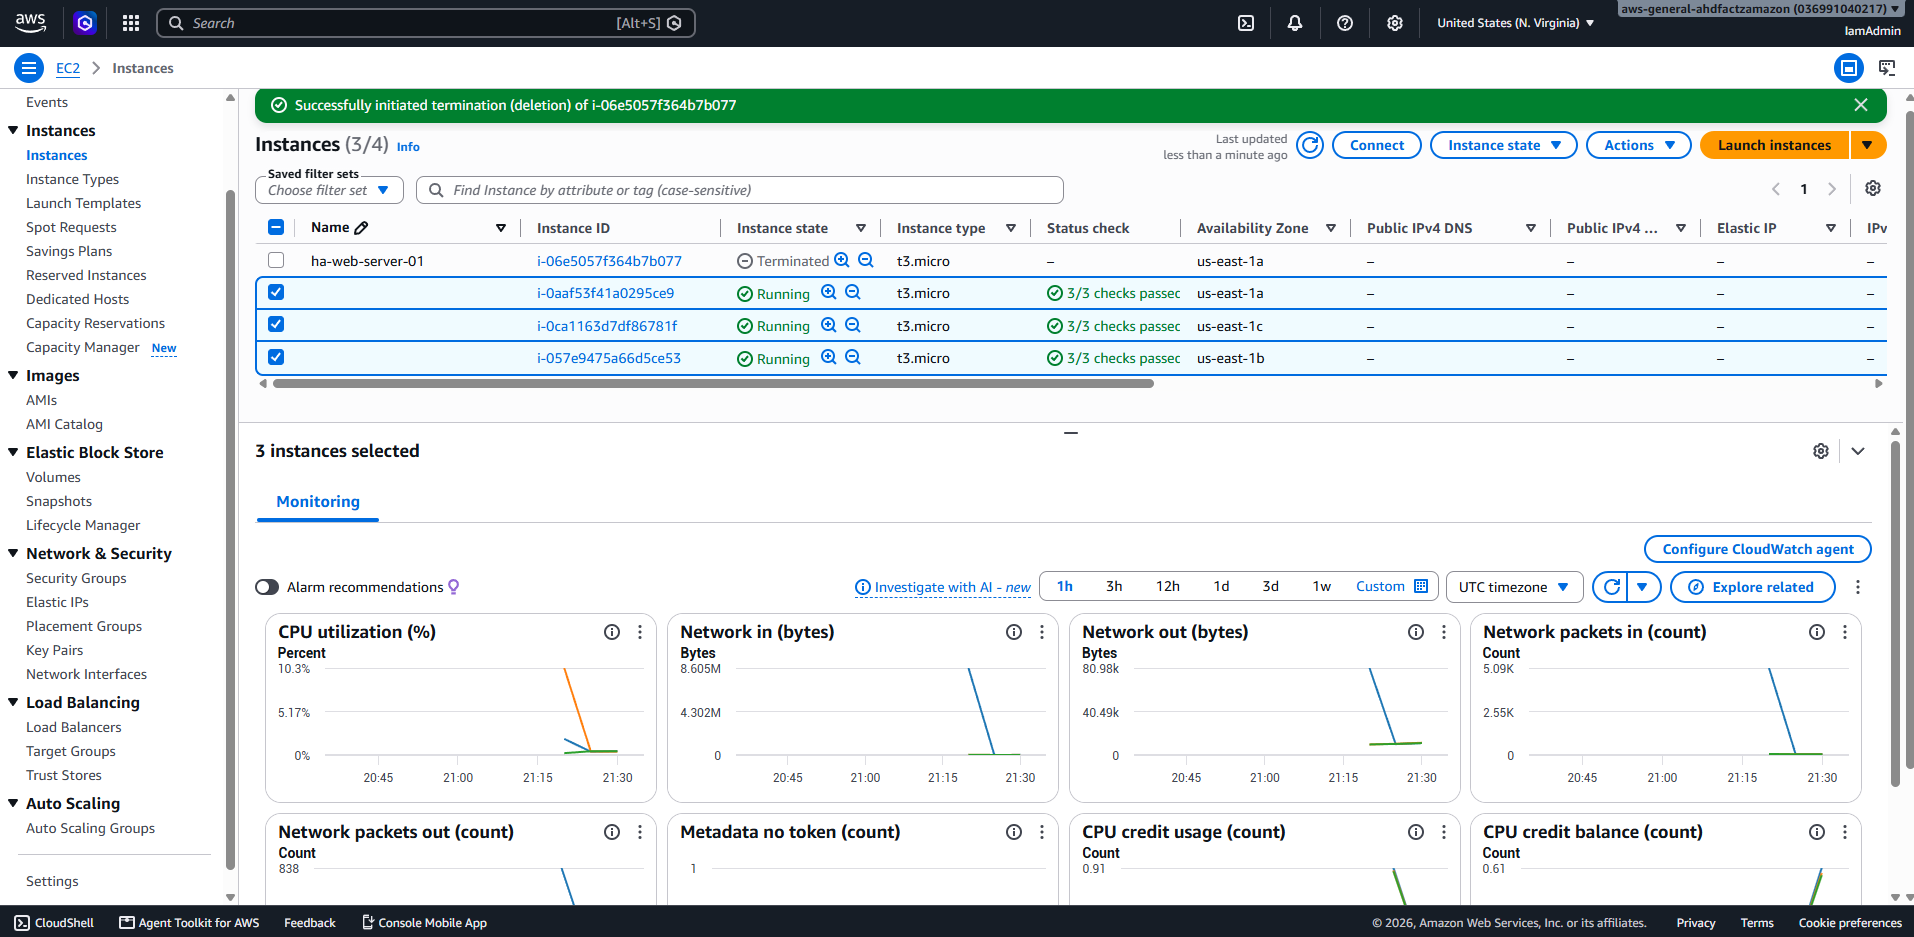
As soon as the Auto Scaling Group was created, AWS launched three EC2 instances using the Launch Template.
Each instance automatically registered with the Target Group, passed the health checks, and started receiving traffic from the Application Load Balancer.
Watching everything come together at this point was probably the most satisfying part of the project.
Testing Everything
Once everything was running, it was time to see if it actually worked.
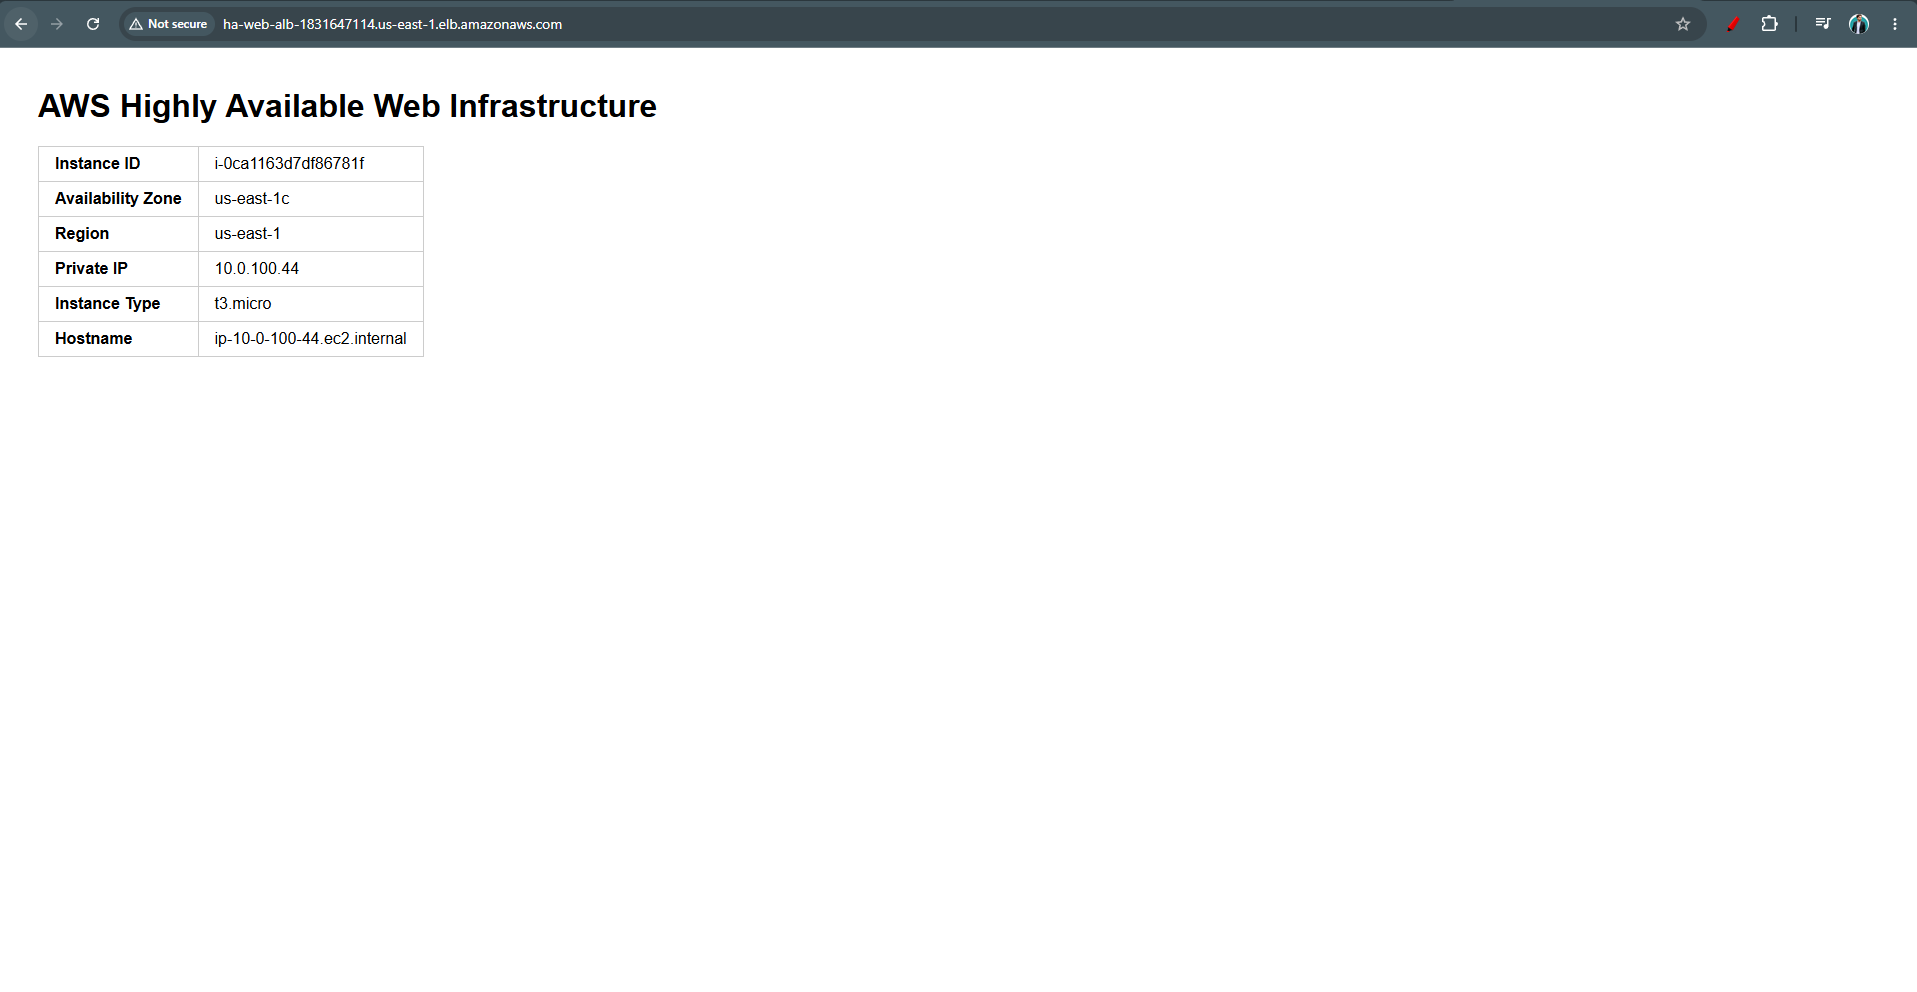
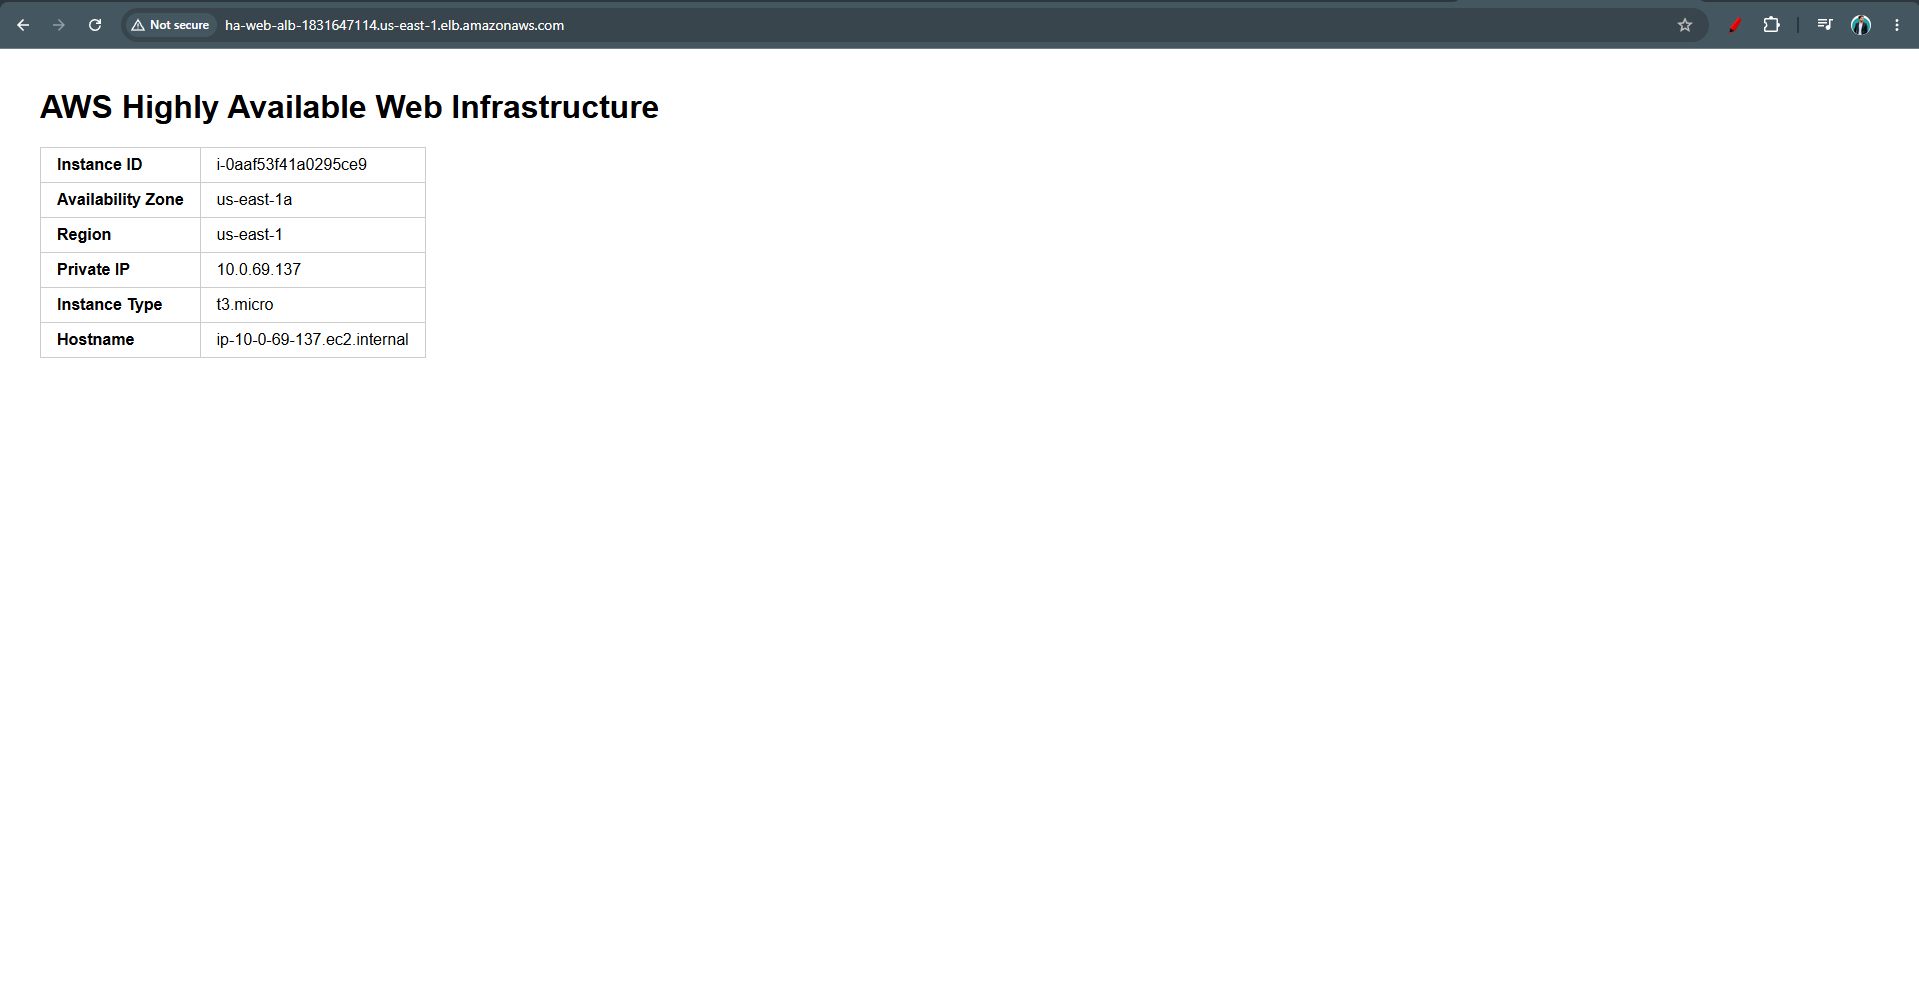
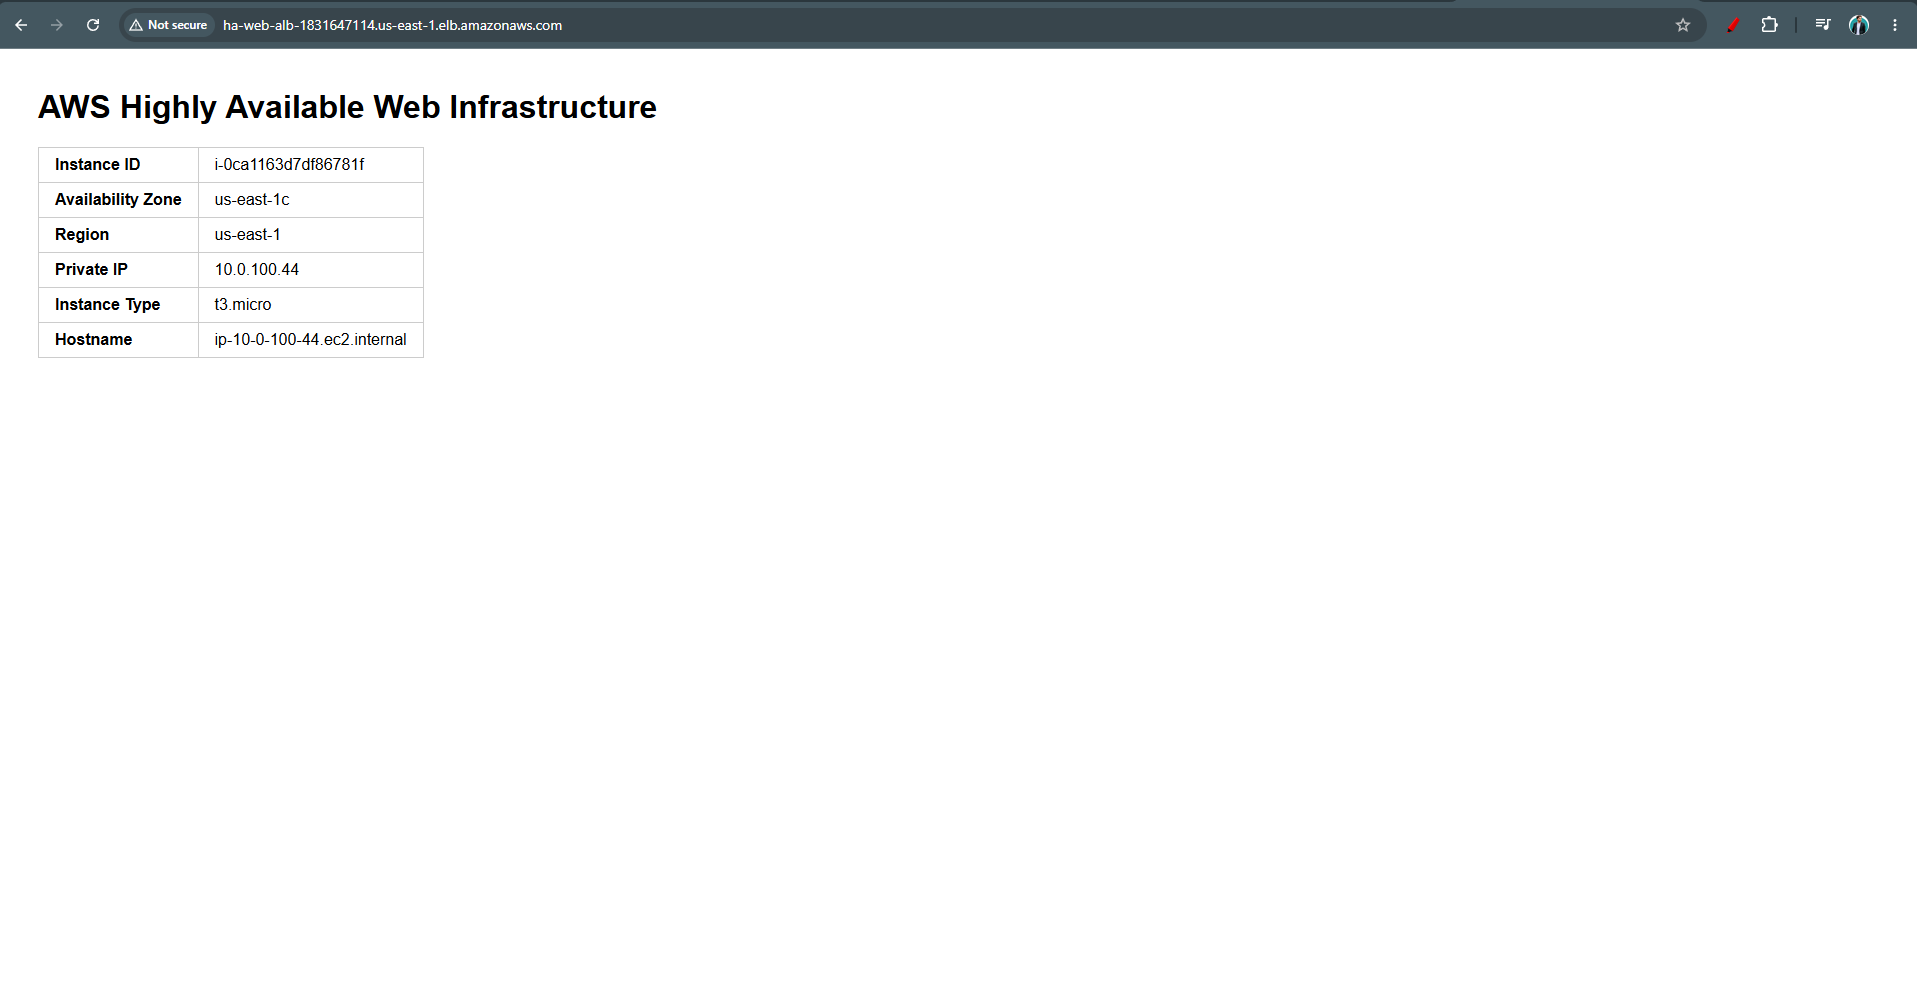
I opened the DNS name of the Application Load Balancer in my browser and refreshed the page a few times.
Since my webpage displays the instance ID and Availability Zone, I could immediately see the requests moving between different EC2 instances.
That confirmed the load balancer was distributing traffic correctly across all three Availability Zones.
What I Learned
This project connected a lot of AWS concepts that I had learned separately.
Before this, I understood what a VPC was. I understood EC2, security groups, route tables, and load balancers individually.
Building everything together helped me understand how all those services actually depend on each other.
The biggest takeaway for me was understanding the relationship between the Application Load Balancer, the Target Group, and the Auto Scaling Group. At first, I assumed the load balancer was responsible for scaling instances, but that's not how it works. The Auto Scaling Group launches and replaces instances, the Target Group performs health checks, and the load balancer simply sends requests to healthy targets.
That one concept made the entire architecture make a lot more sense.
Final Thoughts
This is probably the first AWS project I've built that feels like a complete system instead of a collection of individual services.
There's still a lot I can improve. I could add HTTPS with ACM, Route 53, CloudWatch scaling policies, an RDS database, or even a CI/CD pipeline.
But as a foundation, I'm really happy with how this turned out. More importantly, I now understand not just what each AWS service does, but how they all work together to build a highly available application.